Tenchu San Portable “PSP”
All Items
At the item selection screen:
Hold R + L, press UP, square(2), LEFT, square(2), DOWN, square(2), RIGHT, square(2), UP, square(2), LEFT, square(2)
Increase Items (x10)
At the item selection screen:
Hold R + L, press square(3), RIGHT, DOWN, LEFT, UP
Infinite Items Storage
At the item selection screen:
Hold R + L + Triangle, press UP, UP, DOWN, DOWN, LEFT, RIGHT, LEFT, RIGHT, release Triangle and press Square(3)
Restore Health
Pause the game and press:
LEFT, RIGHT, UP, DOWN, square(3)
Unlock Demo Level
At the start screen, press:
UP, DOWN, RIGHT, LEFT, X(3)
Tenchu 3 - Wrath of Heaven “PS2”
Todos os códigos secretos foram testados no Sony Playstation 2.
Todas as missões (modo story)
Na tela de seleção de missões, aperte:
L1, R1, L2, R2, direita, quadrado, L3, R3
Fase secreta (Rikimaru)
Na tela do título, aperte:
L1, cima, R1, baixo, L2, direita, R2, esquerda
Nota
Há um outro modo de se conseguir essa missão, para tanto complete o jogo com os três personagens.
Habilitar missão demo
Na tela do título, aperte:
cima, baixo, direita, esquerda, X, X, X
Todas as missões (multiplayer)
Na tela de seleção de missões no Multiplayer, aperte:
L1, R1, L2, R2, direita, quadrado, L3, R3
Todos os layouts
Na tela de seleção de missões, aperte:
R3, L3, R2, L2, R1, L1
Todos os personagens
Na tela do título, aperte:
L1, R2, L2, R1, direita, esquerda, L3, R3
Todos os itens
Na tela de seleção de itens, segure L1+R1 e aperte:
cima, quadrado, quadrado, esquerda, quadrado, quadrado, baixo, quadrado, quadrado, direita, quadrado, quadrado
Aumentar quantidade de itens
Na tela de seleção de itens, segure L2+R2 e aperte:
quadrado, quadrado, quadrado, cima, esquerda, baixo, direita
Itens infinitos (levar para a missão a quantidade de itens que quiser)
Na tela de seleção de itens segure L1+L2+R1+R2 e aperte:
quadrado, quadrado, quadrado, cima, esquerda, baixo, direita, quadrado, cima, direita, baixo, esquerda
Sangue no máximo
Pause o jogo e aperte:
cima, baixo, direita, esquerda, quadrado, quadrado, quadrado
Ligar habilidades especiais
Pause o jogo, segure L1+L2 e aperte:
cima, cima, baixo, baixo solte o L1+L2 e aperte quadrado, quadrado, R1, R2
Mostrar pontuação e tempo
Pause o jogo e aperte:
direita, direita, esquerda, esquerda
Nota
faça isso no controle 2.
Aumentar pontuação
Pause o jogo, segure L1+R1 e aperte:
direita, direita, esquerda, esquerda.
Nota
Faça isso no controle 2. Após realizar o truque de ver a pontuaçao, logo perceberá que aumentou 100 pontos no seu placar.
Fim dos cheats, vamos continuar agora com o guia completo desse jogo.
Complete Walkthrough Tenchu 3 - Wrath of Heaven
Nota
Para mais guias legais como esse você só encontra em: https://gamefaqs.gamespot.com
Tenchu: Wrath of Heaven is one of the best games on PlayStation2. You play as one of three ninjas and go around killing people, but there is a little more to it than that. Well, I am making this guide to help you, the player.
All walkthroughs are based on the first layout and all of the walkthroughs are complete as of now.
Table Of Contents
Controls
Basics
Moves List
Tips
Stealth Kills
New Abilities
Items List
Enemies
Rikimaru’s Walkthrough
Ayame’s Walkthrough
Tesshu’s Walkthrough
Bonus Missions Walkthrough
Co-Op Walkthrough
Versus Tips
Multiplayer Moves List
Codes
Secrets
Endings And B-Side
Frequently Asked Questions
Version History
Contact Information
Shameless Self Promotion
Legal Information
Controls
Here is the control scheme for the game.
X - Jump Square - Attack Triangle - Use Selected Item Circle - Guard L1 - Manual Camera L2 - Select Item Moving L3 - Move R1 - Stealth R2 - Lock-On Moving R3 - Secondary Camera Pushing in R3 - Detonate Sticky Bomb Select - Show Map Up on D-Pad - Grappling Hook Down on D-Pad - Healing Potion Left on D-Pad - Select Item Right on D-Pad - Select Item
Basics
The Ki Meter
The Ki meter is something you will rely on throughout the whole game. It tells you how aware an enemy is of your presence. Here are what each symbol means.
!! = The enemy sees you. ! = The enemy sees you, but he isn’t coming after you yet. !? = The enemy things you are there, but he is not sure. ? = The enemy is completely unaware of your presence.
There will be a number in the middle of the Ki meter and goes on a scale from 0 to 100. 0 means that there are no enemies anywhere near you and 100 means you are right upon an enemy. Your number will get higher as you get closer to enemies and lower as you go away from enemies.
Stealth Kills
Stealth kills are kills that you make in one hit and the enemy is not aware of you. They usually start with a cut-scene but sometimes don’t. Every time you do a stealth kill, you will get some Kanji in your Kanji meter. After you get around 9 Kanji, you will get a new ability from a level. To learn more about stealth kills and how to do them, read the Stealth Kills section.
Items
There are lots of items that are hidden around each level and you can pick them up and use them. You also have a items select screen before you start a mission. To learn more, visit the Items List section.
Scoring
Each time you do something in a level, you get points. To unlock special things, you need to get the highest grade in scoring. Grand Master is the best rank.
450 + = Grand Master / Master of Assassins for Tesshu 350 - 445 = Expert Ninja / Professional for Tesshu 250 - 345 = Ninja / Rookie 100 - 245 = Thug 0 - 95 = Novice
You get and lose points for some things too. Here are the things and how many points you will earn or lose.
+450 = Never spotted during the mission +20 = Each stealth kill +5 = Each regular kill -150 = First time you are spotted -50 = Each time you kill a civilian -30 = Each time you get spotted after the first time
I hope this section kind of helped you out to better understand the game.
Moves List
Movement
Move - How To Do It
Move - Left Analog (L3) Jump - X Double Jump - X + X Quick Step - Hold R2 + L3 + X Moonsault - R2 + X Crouch - R1 Press Back Against Wall - R1 when near walls Roll - R1 + L3 + X Hang And Move Sideways - X onto the walkway; L3 to move Grappling Hook - Triangle when Grappling Hook’s highlighted Strafe - L3 + R2 Ricochet Jump - X + X when jumping towards a wall
Attacks
Some attacks are exclusive to one character so if you see a name by a move, which means that only that character can do it.
Move - How To Do It
Normal Combos - Square as many times as wanted Special Combos - Same as Normal Combos, but use L3 Cancel Step During Combo - X + L3 Crouch Attack - R1 + Square; can be used to juggle enemies Jump Attack - X + Square Block - Circle Forward Thrust Slash - R2 + X + Square Special Attack - Circle when near an enemy Slash - Square Double Slash - Square, Square Three Slashes - Square, Square, Square Uppercut Slash - R1 + Square Overhand Slash - R2 + Away + Square Crouching Stab And Sweep - R2 + Forward + Square Downward Strike - X + Square Slash To Left - Left + Square Slash To Right - Right + Square Thrusting Stab - Forward + Forward + Square Slash And Leg Sweep - Square + Away + Square Double Slash And Kick - Square + Square + Square + Away + Square Body Slam (Rikimaru) - Circle when close to enemy 360 Slash (Rikimaru) - Rotate L3 + Square Stab (Rikimaru and Ayame) - Square near fallen enemy Knee To The Back (Ayame) - Circle when close to enemy Scissor Kick (Ayame) - Rotate L3 + Square Four Slashes (Ayame) - Square, Square, Square, Square Punch To Chest (Tesshu) - Square near fallen enemy Upper Straight (Tesshu) - Rotate L3 + Square Throw (Tesshu) - R1 + Square Head Butt (Tesshu) - Circle when close to enemy Energy Punch (Tesshu) - Forward + Square + Square + Hold Square
Tips
Stick To The Shadows
When you are in a level that has many enemies, your best bet is to hold R1 and stay as far away as possible. Try to stay in shadowed areas and along walls.
Stealth Kills
Try to always stealth kill enemies whenever possible. This is the best technique to get through each level.
Know Your Enemy
Before striking at an enemy, it is best to study them. Watch the way they move, their waypoints, when they turn, what they do, and what don’t they do. Know them.
Crouch
To crouch, just hold R1. I think you should do this as much as possible. Your chances of being spotted are lower than they would be when you are standing up. If you are spotted, the enemy is a lot less likely to identify you, which will give you some time to run. They will see you, but not really know what you are and shrug you off as if you were something else or as if they were seeing things. Just always stay in stealth mode. Also, if you need to move through water, always hold R1 while going through it. This will prevent the enemy from hearing you and them getting suspicious. It is very useful in most situations.
Killing The Wrong People
When you are playing through the game for real and not for fun, I suggest that you never kill the innocent people. If you do, you will lose 50 points for each one you kill and you will lose all of your Kanji that you have obtained from stealth kills. To read more on this, go to the Enemies section and look under the enemy that is called Geishas. This will help you some more.
Use Items
If you have items, use them. There is no sense and having them and not using them. They all have their pros and cons so read the Items List section for more details on when it is best to use certain ones and when you shouldn’t use certain items. You don’t have to use all of the items that you have in a level, but if you have them and you could use them to help you for the better, you might as well.
Jumping And Dropping
When you are jumping or dropping off of something, I suggest that you always hold R1 and get in stealth mode until you hit the ground. This prevents your character to hesitate and it also prevents a guard that is near from hearing you. This could mean the difference of losing no health and losing some health.
Run
Points-wise and health-wise, it is better to be spotted, run away and come back for a stealth kill than it is to just kill the guard head on. This can conserve health and give you points. A good thing to do is look for something to grapple to or run behind something and hide. Just stay there until things calm down and then try again to get the stealth kill.
Don’t Get Spotted
Do your best to not get spotted at all. You lose 150 points for the first time you are spotted and 30 points for every time after that. Points matter because you need so many points to get Grand Master ratings for Rikimaru and Ayame and Master Of Assassins ratings for Tesshu. You need these ratings to get cool things out of the level that you are currently playing.
Don’t Try To Kill Everything
Don’t try to go Rambo and kill everything in the map. You should always avoid any unnecessary fights to conserve health. This might even help you conserve points too because if you don’t fight someone that would normally spot you, you will keep those points that would have been deducted from your score.
Be Patient
Without the exception of two missions, the Ayame and Rikimaru missions have no time limit at all. Take your time and do everything right. Watch your enemy and learn the area.
Cancel
To cancel the use of an item such as the grappling hook, just press R1. This can be helpful when you don’t want to grapple to far or you clicked the wrong item to use and you don’t want to use it. To cancel an attack, strafe to the right of left while doing it. To cancel the stealth kill animations, just press Circle. This can be useful when you have to stealth kill enemies that are close to each other like the three men near the key at the beginning of Echigoya. This can also be useful when you are invisible for a certain amount of time when using the Invisibility Spell. You can cancel zip-lining with the grappling hook in mid-air by pressing Triangle.
Ninja Vision
Ninja Vision is an ability that can help you in many situations. It helps you see farther for one thing, and it will also help you throw items such as the shuriken farther. Just zoom in as much as you want and aim however you want to aim. This will help you aim for enemies that are far away from you.
Corpses
If an enemy sees a corpse, it will run to it. If you hide behind something, wait for the enemy to get near the corpse and stealth kill them before they run all the way up to it. You can use this numerous times to get a lot of stealth kills racked up in the same location.
Blocking Enemies
If there is an enemy that blocks frequently, go up to him and press Circle. You will do a move that is unblockable to the enemy.
Multiple Enemies
If you get into a situation where you have to fight multiple enemies, I suggest you run. They will murder you if you are against 3 or more people. If they surround you, try to jump over them because you cannot block attacks from behind and you can get away from them if you jump over them. Try to jump on a roof or something.
Pits
Always remember that the ninja rebirth item will not save you from bottomless pits. If you get to a bottomless pit, I suggest for you to look on the other side for something to grapple to, which will cause you a sure landing instead of a chance landing when you jump.
Up And Down
If you come to a dead end, your best bet is to look up for something to grapple to or look down for something to go into. Just make sure when you look down for something that it is not a bottomless pit because those certainly aren’t the way out of levels or anything.
Undead
Physical attacks like the leg sweep and roundhouse kicks will always damage the undead. Other than that, you must have the Murasama sword to damage them.
Doors
If you get caught in a room by an enemy, run out of a door. The enemy will not follow and you can just go right back in for the kill.
Too High
Enemies can never reach a place that you can only reach by grappling hook. Use this to your advantage.
Poison Rice
When an enemy is bending down to get Poison Rice, they are completely vulnerable to attacks and will not see you. When they bend down, I suggest that you run out and stealth kill them so that you will get the rice and the stealth kill.
Well those are my tips. Hope they helped you.
Stealth Kills
Stealth kills are one of the things that make Tenchu so awesome. To do one, go up to an enemy when they do not see you and press Attack. This will show a short, slow-motioned out cut scene showing your character of choice killing his victim in a way different than just slicing or punching (well sometimes). Different stealth kills are achieved when performed from different positions by the enemy.
The positions from which a stealth kill can be done are from above, from behind, from the left, from the right, in front of, and in mid-air. They are all pretty sweet and you should try them all out. The positions are from above but not too far from them, from above when away from them, from the right, from the left, in front of, behind, and a special stealth kill for when enemies are on a sloped surface. I will now list all of the kill descriptions.
Note
Stealth kills can also be done with weapons such as the blowgun because if the enemy does not see you when you shoot it at him, they will die in one hit. This doesn’t have an animation, but it is still a stealth kill nevertheless.
Rikimaru’s Stealth Kills
Rikimaru has six stealth kills. Here they are.
Front
This is a really cool stealth kill. Rikimaru stabs the enemy in the stomach. The enemy will bend over with his head down and Rikimaru will swiftly pull the sword out of them.
Behind
This is a classic stealth kill. Rikimaru goes behind the enemy and slits their throat and blood gushes everywhere.
Right
This is a cool stealth kill. Rikimaru puts the tip of the blade in one hand and the handle in the other and he slits the right side of the neck, then the middle of the neck, and then he slits the right side of the neck. The enemy then kind of twirls on his way to the ground.
Left
This is one of my favorite stealth kills for Rikimaru. He stabs the enemy in the middle of the back while staying to their side. He leaves it in for a minute and then rips it out of them. When it comes out, the enemy turns toward Rikimaru because he pulled it out so hard and then Rikimaru gives them one final slash with the sword across their chest. Really cool.
Mid-Air
This stealth kill is cool. Rikimaru jumps down and shoves the sword into the top of the enemy’s back and then takes it out. Instant death.
Slope
This is one of my favorites. Rikimaru hops on the enemy’s shoulders. When he does, they kind of tilt their head forward in surprise and Rikimaru stabs them right in the back of the head and it goes through. He takes it out and does a back flip off of their shoulders.
Ayame’s Stealth Kills
Ayame has six stealth kills. Here they are.
Front
This is an awesome yet very fast stealth kill. Ayame lunges both of her swords into the enemy’s stomach. She then steps to the side, pulls out the swords, and does a spin. The enemy collapses onto the ground.
Behind
Ayame wraps her arms around the enemy’s neck and crosses her hands with the swords crossed. She then slices the enemy’s throat with both blades. This stealth kill can sometimes behead people, which is really awesome.
Right
This stealth kills is really cool. Ayame hops onto the enemy’s shoulders and causes them to fall forward onto their stomach. She then puts her hand on their chin and lifts their head revealing the neck. She slits their throat and then rolls to the right of them. Really awesome to watch and it just shows her quickness well.
Left
This is one of the most gruesome stealth kills in the game. Ayame does a roundhouse to the enemy and hits them in the back of the head. The enemy bends over slightly to reveal the back of the neck. While she is still spinning from the roundhouse, she lunges forward and slices the back of the neck, which usually ends up in a decapitation. Really cool.
Mid-Air
This is pretty awesome. Ayame jumps onto the enemy’s shoulders and does a 180-degree twist to where she is by the enemy’s face. She then falls to her left and the enemy goes with her. Ayame is unharmed but the enemy land on their neck and are dead. Really cool.
Slope
This is a cool kill. Ayame jumps onto her enemy’s shoulders, twists their neck, and does a back flip. When she lands the backflip, she is standing on the enemy’s shoulders. She then finishes the job and twists the head half of the way around. Talk about seeing behind you. Very awesome kill.
Tesshu’s Stealth Kills
Tesshu actually has seven stealth kills. Here they are.
Front
This stealth kill is really gruesome. Tesshu hits the enemy in the side of the neck. He then throws his hand into the enemy’s chest and rips out their heart. The guard just kind of falls down and dies. Tesshu stands there and holds the beating heart in his hand. Really cool and really gruesome.
Behind
This is an awesome kill. Tesshu takes out his needle and puts it in the back of the enemy’s neck, right below the skull. He then turns away and the enemy falls to the ground. Pretty good kill.
Right
This kill is pretty cool. Tesshu wraps his arms around the enemy’s neck and breaks it. He then plunges his arm into their back and breaks a few parts of the spine. Then, the enemy falls and Tesshu does this little bowing thing. Pretty cool.
Left
This is a very awesome kill. Tesshu grabs the guard’s left arm and breaks it. He then twirls them around and breaks the right arm. Lastly, he twists their neck all the way around. The enemy walks a little and falls flat on his face.
Mid-Air
This stealth kill is really sweet. Tesshu jumps on the enemy and they fall to the ground. He then punches them hard on the back and it causes some of their vertebrae in their spine to break away from the others. The enemy then dies. Really awesome.
Slope
This is a pretty cool kill. Tesshu hops on the enemy’s shoulders and lunges a needle through the top of their neck. The enemy dies and Tesshu does a flip off of them. Really awesome kill.
With Item
Like I said earlier, Tesshu has seven stealth kills. To do this one, you must have the Kumihimo item. If you have it, get above someone and use the item. Aim it towards their neck and the kill will commence. It shows the enemy struggling with the noose around their neck. After a moment, Tesshu will tug the rope and cause them to lift and hang the enemy. Really cool.
Dual Stealth Kills
Dual stealth kills are done in the co-op multiplayer mode. It happens when one character goes and starts the stealth kill to an enemy while the other player is pretty close to both of them and press Square too. There is a total of 3 dual stealth kills and each different one is done when you use 2 different characters.
Rikimaru And Ayame
Ayame jumps and grabs the enemy’s head and she horizontally spins once around the enemy. At the same time, Rikimaru slashes the guy in the stomach area. Then, Rikimaru and Ayame both pounce on one of the guy’s shoulders and perform a backflip to land behind the guy a few feet. They then cross each other in an X pattern and get ready for the last part of the kill. Rikimaru slashes the guy from the front and Ayame from the back. The enemy then falls to the floor while both of the characters are kneeling on their swords.
Rikimaru And Tesshu
Tesshu runs up and breaks the enemy’s neck. While he is doing this, Rikimaru jabs the sword through the enemy’s back. Tesshu then lets go of the enemy and Rikimaru takes the sword out of the guy’s back and he just falls to the ground in front of him.
Tesshu And Ayame
Ayame rolls through the enemy’s legs and ends up behind the enemy. The enemy then bends his head forward and Tesshu grabs a hold of it while locking his arms and twisting it up his back, which causes the neck to break. Ayame then runs and steps on Tesshu’s back and jumps off and Tesshu lifts the enemy’s head. Ayame is now doing a dive and thrusting both of her blades into the enemy’s stomach. She then does several flips off of the enemy. Tesshu then flips the enemy onto the ground and the kill is over.
Well, that’s it. I hoped it helped you somehow.
New Abilities
New abilities can be obtained for each character by getting a certain number of stealth kills in a level. You need to fill up the Kanji meter (meter that has little symbols that light up when you do a stealth kill). I will give a list of abilities for each character and the level that you have to get the amount of stealth kills on. Tesshu comes with all of his abilities already so I will just list them.
Level |
Ability |
Character |
1 |
Shoulder Thrust |
Rikimaru |
2 |
Ninjitsu Block |
Rikimaru |
3 |
Ninja Vision |
Rikimaru |
4 |
Grappling Hook Combo |
Rikimaru |
5 |
Cling To Ceiling |
Rikimaru |
6 |
Feign Death |
Rikimaru |
7 |
Wall Kick |
Rikimaru |
8 |
Ninja Mind Control |
Rikimaru |
9 |
Wrath of Heaven |
Rikimaru |
10 |
Wrath of Heaven |
Rikimaru |
1 |
Somersault Kick |
Ayame |
2 |
Ninjitsu Block |
Ayame |
3 |
Ninja Vision |
Ayame |
4 |
Grappling Hook Combo |
Ayame |
5 |
Cling To Ceiling |
Ayame |
6 |
Feign Death |
Ayame |
7 |
Wall Kick |
Ayame |
8 |
Ninja Mind Control |
Ayame |
9 |
Wrath of Heaven |
Ayame |
10 |
Wrath of Heaven |
Ayame |
– |
Mimic Animals |
Tesshu |
– |
Upper Straight Combo |
Tesshu |
– |
Enrage |
Tesshu |
– |
Power Block |
Tesshu |
– |
Feign Death |
Tesshu |
– |
Cling To Ceiling |
Tesshu |
In this little mini-section, I will give a detailed explanation of each ability and when it is best to use them. I am going to list them in the order that they will go in so you can press Control and F and see which one you want to read.
Shoulder Thrust Somersault Kick Ninjitsu Block Ninja Vision Grappling Hook Combo Cling To Ceiling Feign Death Wall Kick Ninja Mind Control Wrath of Heaven Mimic Animals Upper Straight Combo Enrage Power Block
Here are the descriptions for each ability.
Shoulder Thrust
How: Square + Square + Away + Square
This is probably the most useful combo that you will use in the game with Rikimaru. It is like a normal combo, but at the end of it, Rikimaru pushes the enemy with his shoulder over a long distance. This is a great move to use when you are fighting more than one enemy or just one. It is also very useful when trying to fight off bosses. Overall, this is probably the best ability.
Somersault Kick
How: Square + Square + Square + Square + Away + Square
This is Ayame’s alternative to Rikimaru’s Shoulder Thrust. This move is her most useful move in combat. When you do the combo, Ayame will do the regular combo and then a little somersault kick at the end. Pretty cool too. This is a great move to use when you are fighting more than one enemy or just one. It is also very useful when trying to fight off bosses. Overall, this is probably the best ability for Ayame.
Ninjitsu Block
How: Press Circle when an enemy is about to attack
Ninjitsu Block is a very useful ability although it is kind of tricky to pull off. What it does is it blocks the enemy’s attack and leaves them off guard. This is a good time to get in a combo or two. Overall, very useful move but it can be kind of hard to pull off. You have to time yourself just right.
Ninja Vision
How: Hold L1 and move R3
Ninja Vision is a pretty useful ability. It just lets you zoom in with the manual camera. It is good on levels where you are trying to watch an enemy that is kind of far away. A good example of this is the Cemetery level with Ayame. It is very useful there because you have to constantly look for enemies and stuff. Overall, good ability in all situations.
Grappling Hook Combo
How: Move L3 in a 360 motion + Square + Triangle
This is ability is sort of useful. What it does is it lets you throw a grappling hook at your enemy after you have hit them in the air and bring them back and stand them up. This will allow you to administer move combos to them. This is only useful in one-on-one fights and boss fights really. I hardly ever used it though. Overall, it is a pretty good ability.
Cling To Ceiling
How: Hold R1 while grappling
This is one of my favorite abilities. What it does is it lets you cling to a ceiling and stay up there for a while. When you go to grapple, just hold R1 as you approach the ceiling and you will stick. From above, you can watch enemies, evade enemies, throw down poison rice for enemies to eat and then attack them, and that’s about it. It is useful in situations where you have been seen and you are trying to get the enemy off of your back or if you are trying to get a closer look at the enemy. Overall, very good ability.
Feign Death
How: Rotate L3 360 degrees + press R1 + Square to attack
This is a pretty useful ability when you are trying to stealth kill a guard that is in front of you and will not turn around. What your character does is they stab themselves in the chest. Rikimaru uses his sword, Ayame her swords, and Tesshu uses his needle. When you fall, the enemy will come and look over your body to see if you are dead. When they do, they are in a perfect position to be stealth killed so press Square when you get ready. You lose so many hit points after stabbing yourself and you lose some more every so often that you are on the ground. You lose like 1 hit point a second. Overall, it is a pretty good ability after you have learned to use it correctly and have had practice with it.
Wall Kick
How: Jump towards a wall and press Square
The Wall Kick is a very good maneuver. All you do is run and jump towards a wall. When you get close to it, press Square. Your character will then ricochet in the opposite direction and damage whatever it hits. The downside to this ability is the fact that there is no way you can pull it off whenever the enemy is aware of your presence. They will just automatically block it. When you do it to someone that is unaware of you, it will usually kill the enemy in one hit. It is a pretty good maneuver overall. You just have to learn when and when not to use it. It is a pretty cool looking move though.
Ninja Mind Control
How: Hold R2 + Up + Down + Square
Ninja Mind Control is a pretty cool ability. When you use it, your character will do a special hit to an enemy and make them get very confused. They will start attacking the other enemies for a limited amount of time. This is a very good move to use when you are going up against a few people. Overall, great move to use when you know when and how to use it.
Wrath of Heaven
How: Press Circle + X at the same time
Wrath of Heaven is the big daddy of all of the abilities. It is the coolest one. You have to have a good bit of hit points to pull it off. I think the lowest I ever tried and pulled it off was 40 hit points. Anyways, after you finish it, you will only have 1 hit point left. If you make contact with an enemy with 100 hit points or lower, you will kill them on contact. When you are going to use this move, you have to time it correctly and line yourself up with the enemy correctly. A miss could mean that the enemy is about to kill you whenever you get done. Just be careful when using it. When you use it with Rikimaru, he charges up and impales his sword through the enemy and holds it there for a while. After a minute or two, he will pull the sword out and lightning will come down and strike the enemy. Ayame’s move is different. If you have ever played Shinobi on PS2, it is like how he dashes, but she swipes at them. Like, Ayame looks like a flash of light and she is cutting all of the enemies. Ayame’s move is slightly better than Rikimaru’s because Rikimaru can only kill one enemy at a time while Ayame kills all of the enemies that are close to her. Even though Ayame’s is the most powerful, I think that Rikimaru’s looks the coolest. Funny how that works. Overall, the move is very awesome looking for both characters and very useful in the right situations.
Mimic Animals
How: Press R1 + Circle at the same time
This ability has the same effects as the Decoy Whistle item does. It just makes you make an animal sound. Say an enemy spots you and you run out of a room. The enemy is hot on your track, but your Ki meter is purple with the question mark. Now, you can use the Mimic Animals ability effectively. When you press it, it will make an animal noise, and it is usually of a rooster or dog or something. Well, the enemy will think that they just saw something or something and will no longer pay attention to you, giving you another chance for that stealth kill. I would use it whenever it is needed. Overall, it is a great ability to have.
Upper Straight Combo
How: Rotate L3 in a 360 motion + Square
This is Tesshu’s equivalent to Rikimaru’s Shoulder Thrust and Ayame’s Somersault Kick. When you do the combo, it will make Tesshu do an uppercut and then send a right hand out and hit the enemy causing them to fly through the air. It is a pretty good maneuver in all fights. Overall, good ability.
Enrage
How: Circle + X at the same time
Enrage has the effects on Tesshu that the Strength Potion would. It makes him stronger for a limited amount of time. That is all it does, well, besides making his arms glow red. This move is very useful when fighting packs of enemies because you will be able to have to hit a guy less times to kill them and you can move on to others. The ability is overall pretty good.
Power Block
How: Press Circle when the enemy goes to attack
This is Tesshu’s alternative to the Ninjitsu Block ability. Power Block is a very useful ability although it is kind of tricky to pull off. What it does is it blocks the enemy’s attack and leaves them off guard. This is a good time to get in a combo or two. Overall, very useful move but it can be kind of hard to pull off. You have to time yourself just right.
Well that’s it. Hope that helped you out.
Items List
There are several items to help you in your missions in the game. I will list them all and give a good description of them. I am going to list them all before I describe them so you can see what order they will be in. If you are wondering what level to beat with Grand Master to get a certain item, hold down Control on your keyboard and press the F key. Type in the name of the item and see if it comes up after any missions.
Bow And Arrow Spear Fireworks Tetsubishi Grappling Hook Poison Antidote Mine Colored Rice Tiger Trap Ninja Armor Ninja Rebirth Chameleon Spell Fire Spell Invisibility Spell Super Shuriken Decoy Whistle Exploding Arrow Binding Spell Stone of Power Dog Bone Shuriken Blow Gun Grenade Smoke Bomb Health Potion Small Health Potion Poison Rice Sticky Bomb Strength Potion Dokuto (Ayame only) Kasumi and Shizuku (Ayame only) Fugaku Sword (Rikimaru only) Muramasa (Rikimaru only) Magazine (Tesshu only) Bamboo Gun (Tesshu only) Disguise (Tesshu only) Kumihimo (Tesshu only) Throwing Needle (Tesshu only) Super Needle (Tesshu only)
Bow And Arrow
The bow and arrow can be obtained by killing archers that are on a few different levels. Once you do, just walk over them and pick it up. This can be good for certain situations, but I would just not use it in most. It doesn’t take away too much hit points so I would just keep using the sword. If there is an enemy that is far away, you might be able to get some use out of this thing. Overall, it isn’t as useful as some of your other weapons.
Spear
The spear is less useful than the bow and arrow. It only has 2 different move things and it doesn’t take away that many hit points. On top of that, it swings very slowly. By the time that you get it around to hit the enemy, he could have already started hitting you and stopped the swing. I suggest to just use your sword.
Fireworks
Fireworks are very good items to bring along with you if you do not have invisibility spells or chameleon spells available to you. What you do is, press Triangle when they are highlighted, and this will cause Rikimaru to put them on the ground and the fireworks will shoot. When this happens, the guards are going to look up, which will give you a chance to stealth kill them. This is only really necessary to use when there is a guy that doesn’t turn around and is always facing you.
Tetsubishi
Tetsubishi is kind of like an add-on to the Grappling Hook. It lets you pull enemies over distances. If you have ever played Mortal Kombat and have used Scorpion and did his «Get Over Here» move, well, it is kind of like that except for it doesn’t enter them or anything. It is a really useful item when you want to stealth kill someone away from other people. For example, say there are two guys in front of you. Use tetsubishi and pull one back to you and kill him. This will cause you to not have to disturb the other guy and get both stealth kills. You can also use this to pull enemies on roofs with you for a sloped stealth kill.
Grappling Hook
The grappling hook is the most important item in the game. It is used to scale walls and you can get on the roof of buildings with it. To use it, hold down Triangle and aim it at a roof or something. Whenever you think you have it in the right spot, release Triangle. This will cause you to «zip» to the area that you highlighted. This can help when you are fighting people because you can pull yourself to a place where they cannot reach you. You can then go back later and get a stealth kill. If you earn the Grappling Hook Combo ability for Rikimaru and Ayame, you can connect combos with the Grappling Hook and make yourself even more of a fierce fighter.
Poison Antidote
In my opinion, this is the most useless item in the game for everyone but Ayame. You see, Ayame can obtain swords dipped in poison, so she needs the poison antidote or it will take her health away. Well, Rikimaru and Tesshu don’t have any reason to use this. The poison antidote can also be used to heal you against blowgun shots, which are poisonous. Overall, pretty useless item for Rikimaru and Tesshu, but can be a good item for Ayame.
Mine
The mine is a pretty useful item if you know an enemy’s path that he walks. When you place it, it is placed in front of you (make sure not to walk forward or say bye to your health and your unknown presence) and will explode when something walks upon it. It can kill some enemies in one hit and will take away a lot of hit points off of enemies that it doesn’t kill. When you use this though, make sure there are not lots of enemies around because it is very loud and will alert other guards to come check out what happened.
Colored Rice
Colored rice is a useful item in confusing levels like the Limestone Caverns, Gohda Castle, and both of the Tenrai’s Fortress levels. You see, when you use it, your character will place a piece of rice on the ground. If you press Select and go to the map, you will notice that there is a little «marker» where you placed it. This will help you make sure that you aren’t going the wrong way and make sure that you haven’t been to a certain place before. The rice can be eaten by guards so make sure that you have killed all of the guards before placing it or else it will leave the map. Overall, it is pretty useful.
Tiger Trap
The tiger trap is a very useful item. When you use it, your character will place it on the ground and open up the trap. When an enemy steps on it, it will render him useless and he will not be able to counter your attacks. You can just pummel him to death, however, it does wear off after a bit of time. It can be useful at times, but just make sure that you don’t step on it yourself or you will be screwed for a while. Overall, good item.
Ninja Armor
Ninja armor is one of my favorite items in the game. Not only does it change what you look like, it decreases the amount of hit points you lose from when you get hit. Ninja armor usually makes you look a lot cooler, but I think Rikimaru looks kind of stupid with it. Ayame looks more like a ninja though. The item is not available for Tesshu. Overall, the ninja armor item is very useful and one of the best.
Ninja Rebirth
The ninja rebirth item is a very good item to bring along with you on your missions. You don’t actually use it yourself though. It just stays in your inventory, and when you die, it automatically uses itself. You see, it is kind of like an extra continue. You will die and start off right where you died. Very useful item in later levels like Tenrai’s Fortress Part 1 and 2 and the levels with a lot of pitfalls. You should always try to bring one of these on a mission.
Chameleon Spell
The chameleon spell is a great item and one of the most useful in the game. When you use it, your character will turn into an enemy from the level that you are playing until a certain amount of time is up or until you kill someone. Enemies will never think twice about you if you are using it. You can just walk right in front of them and stealth kill them. The item is especially useful when there is someone that can’t be killed by going behind them because they never turn around. The easiest way to get a stealth kill is to use this item. While not being as good as the invisibility spell, it is still extremely good. Very useful item.
Fire Spell
The fire spell item is extremely useful in some situations, but not very useful in others. When you get in a huge fight with 2 or more people at a time, you can use this and it will be of great use. What the fire spell does is it sends a wave of fire all around your character in a big circle. It is effective when fighting one enemy only, but it isn’t really necessary. I suggest using this on the Cemetery level if you are having problems with the part near the well and hut.
Invisibility Spell
The invisibility spell is the second most useful item in the game, right after the grappling hook. It renders you invisible for a certain amount of time. A thing that makes it better than the chameleon spell is the fact that you don’t automatically re-appear after one kill. You just keep on staying invisible for the amount of time that it is available to be used, which is around 10 to 15 seconds.
Super Shuriken
The super shuriken is pretty useful. Unlike a regular shuriken, the super shuriken is around eight throwing knives. You just position your character in a direction, press Triangle, and watch them fly. It is kind of like the fire spell when used. It is strong enough to kill weaker enemies and significantly damage stronger enemies. Overall, pretty good item.
Decoy Whistle
The decoy whistle is a very useful item. Say an enemy spots you and you run out of a room. The enemy is hot on your track, but your Ki meter is purple with the question mark. Now, you can use the decoy whistle effectively. When you press it, it will make an animal noise, and it is usually of a rooster or dog or something. Well, the enemy will think that they just saw something or something and will no longer pay attention to you, giving you another chance for that stealth kill. This item can also be used over and over so don’t worry about conserving it. Use it whenever it is needed.
Exploding Arrow
The exploding arrow is a very useful item that works kind of like the sticky bomb, but without having to press R3. What you do is, you hold down Triangle and aim the exploding arrow. When it gets over an enemy, let go of Triangle and let it fly. The enemy will fly and catch on fire. You can easily kill enemies instantly with this and or damage them significantly. This is one of the best offensive items in the game. This is also very useful in fights where there are a few guys ganging up on you because you can get a few of them down with one arrow. Overall, great item to use.
Binding Spell
The binding spell item is extremely useful. When it is used, your character will make a special seal on the ground around them. If an enemy walks inside it, they will freeze and be confused. This will make them easy targets and you will be able to kill them easier. Overall, great item.
Stone of Power
The stone of power works much like a strength potion except for the fact that it lasts for the duration of a mission. The stone of power will make your character much stronger and will enable you to inflict more damage on an enemy than would be inflicted with the same blow without the stone of power. The item is very useful in fights and boss fights. Overall, great item to use.
Dog Bone
The dog bone is a very useful item. What it does is, it makes a dog come to help aid you in a fight. It is very useful when fighting 2 or more people and you are having a tough time with them. Even though it won’t inflict much damage, it can still confuse the enemy or distract them, which would leave you the chance to hit them. Nevertheless, it is always good to have a friend on your side. Overall, good item.
Shuriken
The shuriken is like a ninja star. It is a very useful item when trying to distract and or harm an enemy. They will only take away around 20 hit points, but it is still some. It is better than nothing. If you throw them to distract an enemy, try to land them on the path that they walk on. When they bend down to pick it up, you can go in for the stealth kill. Here is a hint for the Echigoya level. On the Echigoya level, there are a few beehives. If you throw a shuriken at them and hit them, bees will come out and attack the nearest person. This is a great way to kill one of the guards. Overall, great item. It will be one of your most used items in some of the levels.
Blow Gun
The blowgun is one of my favorite items in the game. What you do is, aim it and shoot it. It will shoot a poison dart out of it. You can instantly kill an enemy with this if they are not aware of you. If they are aware of you, you can still harm them and poison them. When you poison them, they will lose around 10 health points every so often but this wears off after a while. It is very useful when you can’t get a stealth kill by sneaking around or you need a little help in a fight. Overall, very good item.
Grenade
The grenade is a pretty good item. All you do is press Triangle to throw it. It will explode on impact with enemies, but if you miss, it will just go off after a while. The grenade is a very good item when there are not a lot of enemies around in an area. It isn’t a good item when there are other guards around because of its loudness. It will attract other guards. If you get in a fight with 2 or more people, you can use this to give you the upper hand. It is also very useful in boss fights. Overall, good item but it has its limits.
Smoke Bombs
The smoke bombs are very good items in almost any situation. All you do is throw them. Your character will throw it in front of them and the smoke will immediately come out of it. This is a very effective way to get away from enemies that have spotted you or confuse enemies and keep fighting them. For example, if you get caught, you can throw down a smoke bomb and run around the corner or something and hope that they don’t find you. If you are fighting someone and you want to keep fighting but play a little dirty, you can always throw it down and make them confused. You can then start pummeling them with attacks.
Health Potion
The health potion is the item that you will probably use most in the game. All you do is highlight it and press Triangle to make your character drink it. It will fill your life back to 100 hit points, no matter how low on life you were. Overall, this item is extremely useful. I suggest bringing it on all of your missions.
Small Health Potion
The small health potion is a very good item, but not as good as the regular health potion. All you do is highlight it and press Triangle to make your character drink it. It will give you back around 30 hit points. Overall, this item is very useful. If you have health potions available to you, this item is kind of useless although you might want to bring it in case you run out of health potions.
Caltrops
Caltrops are a pretty useful item. They are like little tacks that your character will drop behind them. It hurts someone’s feet when they step on them and will cause them to stop for a bit. This is very useful when trying to evade some enemies or something. Very good item.
Poison Rice
The poison rice is probably one of the best items in the game. It is a bowl of rice that your character will throw in front of them. If an enemy sees it, they will bend down to pick it up and eat it. If they eat it, it will poison them and temporarily paralyze them, leaving you an open chance for a stealth kill. You could eventually kill them after using enough rice balls though. A little hint is to throw the ball, wait for the enemy to pick it up, and right before he eats it, kill him. This will get you the rice and the kill. Overall, very good item.
Sticky Bomb
The sticky bomb is probably one of the best offensive weapons in the game. What you do is, you highlight it and aim it at an enemy. When you think that you have it on target, let go of Triangle to throw it. When it lands on something, it will stay there (unless a guard picks it up). If it lands on an enemy, it will stay on them. Now when you want to detonate it, press down on the R3 button. This will cause it to explode and usually kill anyone in its path. Very good item.
Strength Potion
The strength potion is a pretty good item. For a limited amount of time, it will build your strength up and you will be a lot stronger, meaning your attacks will do much more damage. It is very useful in boss fights and in battles with 2 or more enemies. Overall, good item for a few situations.
Dokuto
Dokuto is a weapon that is exclusive to Ayame. This is a special pair of swords with poisoned blades. When you select them, it will automatically start poisoning you, but if you have the poison antidote, you will lose no health at all while it is in use. Anyway, it helps because it will poison enemies and take more damage off of them. It is a very affective weapon when used with the poison antidote. If you don’t have the antidote, I suggest not even using this item because it will do more harm than good. Overall, it is a good item but can have major flaws.
Kasumi and Shizuku
Kasumi and Shizuku is an item that is exclusive to Ayame. They are short swords just like Ayame’s regular weapon, except for the fact that it kills the undead. It is it’s only real use. When you have it selected, you will drain health for the time that you use it. That kind of ruins the weapon though. Overall, good item.
Fugaku Sword
The Fugaku sword is an item that is exclusive to Rikimaru. The Fugaku sword is a very useful item. It is just like Rikimaru’s other sword, except for the fact that it has much stronger attacks. It can help in levels where there are harder enemies and stuff. I suggest using it if you have it. Overall, great weapon.
Muramasa
Muramasa is an item that is exclusive to Rikimaru. It is a big sword just like Rikimaru’s regular weapon, except for the fact that it kills the undead. It is it’s only real use. When you have it selected, you will drain health for the time that you use it. That kind of ruins the weapon though. Overall, good item. I would only use it when necessary though.
Magazine
The magazine item is exclusive to Tesshu. It is kind of like Tesshu’s alternative to poison rice. If you throw it in front of an enemy, they will bend down to pick it up. A little hint is to throw the magazine, wait for the enemy to pick it up, and kill him right when he is still bended over. This will get you the kill much easier. Overall, very good item.
Bamboo Gun
The bamboo gun is an item that is exclusive to Tesshu. It is a pretty good weapon. The bamboo gun is actually a gun. What you do is, you lock- on to an enemy so that they are in front of you. Then, press Triangle and Tesshu will shoot at whatever is in front of him. This can kill most enemies in one shot and is very useful against bosses. Overall, great item to use in most situations.
Disguise
The disguise item is an item that is exclusive to Tesshu. It is pretty much his alternative to the chameleon spell. When you use it, your character will turn into an enemy from the level that you are playing until a certain amount of time is up or until you kill someone. Enemies will never think twice about you if you are using it. You can just walk right in front of them and stealth kill them. The item is especially useful when there is someone that can’t be killed by going behind them because they never turn around. The easiest way to get a stealth kill is to use this item. While not being as good as the invisibility spell, it is still extremely good. Very useful item.
Kumihimo
Kumihimo is an item that is exclusive to Tesshu. It is kind of like a noose. You have to be above an enemy to use this. I suggest being on a roof. You just aim it at an enemy like the grappling hook and try to get the marker on their neck. When you have placed it right, let go and you will get a secret stealth kill. It is pretty awesome. I’m not positive if this thing can be used when the enemy is aware of you, but I will check later and find out. Overall, the item is really of no use if you can just stealth kill them from behind. If they are in front of you and looking in your direction, it could be a good item to use in that situation. Overall, it is a pretty good item in different situations.
Throwing Needle
The throwing needle is an item that is exclusive to Tesshu. It is pretty much his alternative to a shuriken. It is a very useful item when trying to distract and or harm an enemy. They will only take away around 20 hit points, but it is still some. It is better than nothing. If you throw them to distract an enemy, try to land them on the path that they walk on. When they bend down to pick it up, you can go in for the stealth kill. Here is a hint for the Echigoya level. On the Echigoya level, there are a few beehives. If you throw a throwing needle at them and hit them, bees will come out and attack the nearest person. This is a great way to kill one of the guards. Overall, great item. It will be one of your most used items in some of the levels.
Super Needle
The super needle is an item that is exclusive to Tesshu. It is pretty much his alternative to a super shuriken. Unlike a regular throwing needle, the super needle is around eight needles instead of one. You just position your character in a direction, press Triangle, and watch them fly. It is kind of like the fire spell when used. It is strong enough to kill weaker enemies and significantly damage stronger enemies. Overall, pretty good item.
Well that’s it. Hope it helped.
Enemies
In this section, I will list each enemy and good ways to defeat them.
Samurai Or Ronin (Sword)
This is probably one of the easiest enemies in the game. They are pretty much the normal guard that you will find spread out throughout most levels. Their attacks are pretty easy to block and dodge. They also don’t attack very often. Even though these enemies are so easy to beat one-on-one, they can be tough when fighting them in groups. These guys usually sport around 50 or less hit points.
Samurai Or Ronin (Spear)
This is probably one of the easiest enemies in the game. They are pretty much the normal guard that you will find spread out throughout most levels. Their attacks are pretty easy to block and dodge. They also don’t attack very often. Even though these enemies are so easy to beat one-on-one, they can be tough when fighting them in groups. These guys usually sport around 50 or less hit points. They have a rather large attack range because of their spears so try to get behind them or to their side since these guys are very slow. You shouldn’t have much problem with them.
Samurai Or Ronin (Bow)
This is probably one of the easiest enemies in the game. They are pretty much the normal guard that you will find spread out throughout most levels. Their attacks are always long range really. When you get close to them, they kind of hesitate for a bit and run a little. They don’t always do this though. They also don’t attack very often. Even though these enemies are so easy to beat one-on-one, they can get very aggravating when you are fighting some other guard and the samurais with bows are shooting at you non-stop. These guys usually sport around 50 or less hit points. Their only real attack is to shoot at you and it takes them a little while to get the next arrow out of the holder.
Dog
The dogs are pretty challenging because they are so small and hard to hit. If you can manage to sneak up on one, jump and press attack. This is much easier to hit them. These things can kind of make your presence known by barking so more guards will come. They can be very frustrating to fight. Just try to hit them whenever they land. Their only attack is to jump in the air and bite at you. They always have 5 hit points and only take one hit to kill. You can kill them with one shuriken if you hit them with one.
Cat
The cats don’t attack you. They merely sleep. If you walk by one, it will get out and start making noise and running around the room. Their only purpose is to alert the guards of your presence. They cannot be killed so don’t even try to catch them.
Bees
The only levels that these appear on is Echigoya and the Buddha Temple level. They stay in their beehive until they are disturbed. When they are, they attack the nearest person. They can easily kill a guard when they come out of their hive just once. To get them out, simply hit the hive with something. It is easy to hit with a shuriken. After they kill attack something for a bit, they go back into their hive. The person they attack also does a bit of a dance and it is very funny to watch. They can be useful to you or a menace to you.
Ninja
The ninjas are very tough enemies. They are very quick and attack often. They usually block nothing so you can get a combo or two in easily. They move around a lot and do lots of back flips. They can be very tough to fight in groups. Just try to stealth kill these guys. Well, you should try to stealth kill everyone in the game, but mainly them since they are so tough to fight in one-on-one combat.
Kunoichi (Red)
These enemies are kind of tough. It is a woman in a red costume. Their attacks are very similar to Ayame’s, but they aren’t as fast or powerful. They are kind of like the female counterpart to the ninja. They aren’t very tough in one-on-one combat because they don’t block too often. They do, however, attack whenever they get the chance, but they are very easy to block.
Kunoichi (Black)
These enemies are just like the red Kunoichis, except for the fact that they are much faster and their attacks are much more powerful. It is a woman in a black costume and white hair. Their attacks are very similar to Ayame’s, and just fast and powerful. They are kind of like the female counterpart to the ninja. They are pretty tough in one-on-one combat because they block often. They attack whenever they get the chance, but they are very easy to block.
Geisha (Innocent)
These are just the innocent civilians that you will come into contact with in a few levels. They have around 30 hit points and are unarmed. They will run away from you and tell your enemies if they spot you. If you fight them and kill them, you will lose all of the Kanji that you obtained from stealth kills. They are not a threat to you in the sense that they will attack you, but they will tell the other enemies about your presence, so they kind of are a threat to you. If you are playing the game for fun, I suggest you kill them. If you are playing to get new abilities, try not to kill them so you don’t lose that Kanji. The geishas will appear as a bald guy that looks like he is drunk or a woman in a komono with black hair.
Jonin (Red)
These guys are red demons with swords. They act almost the exact same as the regular ninjas and are very aggressive. They are very quick and attack often. They usually block a lot They move around a lot and try to attack often. They can be very tough to fight in groups. Just try to stealth kill these guys. Well, you should try to stealth kill everyone in the game, but mainly them since they are so tough to fight in one-on-one combat.
Jonin (Blue)
These guys are just like the red jonin, but they have claws instead of swords. They are very aggressive. They are very quick and attack often. They usually block a lot They move around a lot and try to attack often. They can be very tough to fight in groups. Just try to stealth kill these guys. Well, you should try to stealth kill everyone in the game, but mainly them since they are so tough to fight in one-on-one combat. When the blue jonin get low in health, they have two grenades in their pockets that they will light and run towards you. When they blow up, they instantly die and they will take away a whole lot of your health points.
Samurai Automaton
These guys are found only in the Amagai Castle. They are basically just like the samurais and ronins except for the fact that they are made of wood and are a lot harder than the humans. They can have either a spear or bow. Their attacks are pretty easy to block and dodge. They usually attack very often. Even though these enemies are pretty easy to beat one-on-one, they can be tough when fighting them in groups. These guys usually sport around 50 or less hit points. They have a rather large attack range because of their spears so try to get behind them or to their side since these guys are very slow. You shouldn’t have much problem with them. If they have a bow, just try to use combos on them since they have problems when trying to attack at close ranges.
Chibot
These guys are only found on the Amagai Castle too. They are very odd looking. They are these wooden robots but with the head of a ronin. They are very powerful and have lots of powerful attacks. You can’t get an animation out of them when you stealth kill them, but you can slash at them once to stealth kill them. Try to always stealth kill them because they are very hard when facing them one-on-one. They will also do the kamikaze thing that the blue jonin does when they are low on health. Even though they are very strong on the offensive, they have a very weak defense and very rarely block anything.
Fire Demon (Undead)
These guys look like babies, but babies that are around 5 foot tall. They are pretty easy to kill and they only have one strong attack. They basically blow fire and that is it. At close range, they have a clawing attack, but they aren’t too powerful. These guys are very odd looking and kind of freaky. They are kind of hard to tell which direction they are facing because of the fact that they always have their arms swinging everywhere and their head kind of tilted. Just try to stay close to them if you are going to fight them one-on-one.
Undead Samurai (Undead)
These guys are just like the Samurai Automaton really. They are basically just like the samurais and ronins except for the fact that they are made undead and are a lot harder than the humans. They only have a sword, unlike the automaton. Their attacks are pretty easy to block and dodge. They usually attack very often. Even though these enemies are pretty easy to beat one-on-one, they can be tough when fighting them in groups. These guys usually sport around 80 or less hit points. You shouldn’t have much problem with them.
Ghost Head (Undead)
These guys are just a floating ronin head surrounded by a glowing blue color. They hurt you by flying into you, throwing up on you, or biting you. They are very easy to kill. Just swing your sword at them and they are gone. Their is no way that they can block so don’t worry about that.
Shikigami
These guys are just floating ghost or spirit things. They can only attack you by latching onto you and draining your health. Their real purpose is much like the dog, to alert the guards of your presence. They are absolutely easy to kill. You shouldn’t have a problem with them. They are also extremely easy to kill in groups.
Werewolf
These guys are just like the dogs, but they are a lot more aggressive. They are pretty challenging because they are so small and hard to hit. If you can manage to sneak up on one, jump and press attack. This is much easier to hit them. These things can kind of make your presence known by barking so more guards will come. They can be very frustrating to fight. Just try to hit them whenever they land. Their only attack is to jump in the air and bite at you. They always have 5 hit points and only take one hit to kill. You can kill them with one shuriken if you hit them with one.
Ninja Dog
These guys are just like the dogs, but they are a lot more aggressive and they carry a dagger in their mouths. They are also white in color. They are pretty challenging because they are so small and hard to hit. If you can manage to sneak up on one, jump and press attack. This is much easier to hit them. These things can kind of make your presence known by barking so more guards will come. They can be very frustrating to fight. Just try to hit them whenever they land. Their only attack is to jump in the air and bite at you. They always have 5 hit points and only take one hit to kill. You can kill them with one shuriken if you hit them with one.
Monk
These guys are just like the ronins, only they have baskets on their head. This is probably one of the easiest enemies in the game. Their attacks are pretty easy to block and dodge. They also don’t attack very often. Even though these enemies are so easy to beat one-on-one, they can be tough when fighting them in groups. These guys usually sport around 50 or less hit points. They have a rather large attack range because of their spears so try to get behind them or to their side since these guys are very slow. You shouldn’t have much problem with them. There is also a monk or two that have blowguns. Just use close range combat on them because they are almost powerless when you get to close ranges. Their blowguns will also poison you and take away health every so often, but it will wear away after a while.
Kenpo Bouzu
These are just like the normal monks, only they don’t wear a basket on their head and they have no weapon. They are strictly using hand to hand combat. They are extremely hard. These guys are very strong on the offensive and have many quick and powerful punch and kick attacks. They block a lot too. They are easily one of the harder regular enemies in the game.
Bear
The bear is very tough. It sports 300 hit points and will easily kill you. I don’t even think this thing can block. Since it can’t just corner it and do a lot of combos. Do not get too far away from it because it has a lot of attacks where it will jump at you and bite at you. This thing can either be very easy to kill or very hard to kill.
Martial Artists
These guys are bald and wear white, blood-stained uniforms. They are very tough. They have close range attacks like this spinning kick thing and other punch and kick moves. Their long range attack is their ability to shoot these energy balls at you that are unblockable. They are pretty tough to fight one-on-one so try to stealth kill them whenever possible.
Cop
The cops are only present in the Through The Portal level, which is a bonus mission for Rikimaru that takes place in the future. They are big, overweight cops that are carrying either nightsticks or pack a pistol. These guys block a lot and attack a lot. They are very powerful too. They are about the same as the ronins, except they are stronger and block more. The ones with guns will shoot you from long range and hit you at close range. They are pretty tough overall.
Well that’s all of them. I hope this section was of some use to you and helped you in a way.
Rikimaru’s Walkthrough
The 26-year-old Rikimaru is the leader of the Azuma Shinobi-ryu sect and is an outstanding all around fighter. He’s lethal with his sword, and he can move like the wind and he can conceal himself from his foes with expert stealth. Rikimaru is the «middle ground» of the three characters in this game. He’s neither fast nor slow, weak nor powerful. He’s right between Ayame and Tesshu in terms of strength, agility, and attacking power.
Thanks to the Brady Games guide for Tenchu: Wrath of Heaven for the above paragraph.
For a screenshot of Rikimaru, visit the following link:
http://tenchu3.de/english/tenchu3/screens/index2.asp?pic=206 &pagenum=1&no=223
Just copy and paste both parts of the link in your Internet browser.
Mission 1: Echigoya
Recommended Items To Bring Along: Healing Potion, Caltrops, Tetsubishi
Buds of evil flower in the darkness as the land of Lord Gohda experiences a short springtime of peace. The fruits of corruption taste sweet to Gohda’s statesman Nasu when Echigoya’s son Tokubei invites him to the renovated Echigoya estate for dinner. Tokubei plants the seeds by loaning money to innocent villagers and then, when payments aren’t met, abducting their daughters to sell as slaves. Nasu is asked to «overlook» the process. You must punish the evil merchant!
You start off on the ground outside of the compound. First, select your Grappling Hook and grapple onto the wall in front of you. Once you get on it, run to the right and then go straight. Keep running along the wall until you come to the northeast corner of the level. Jump down onto the concrete and pick up the white ball, which is a smoke bomb. Now, get back onto the wall. Go straight towards the northwest corner of the level. When you get there, there is going to be a guard on the ground and a guard above you. Get all the way up against the wall and wait for the guard on the ground to look away. Immediately jump down and stealth kill him. Then, grapple up to the ledge where the other guard is standing. When he is facing away from you, get up there and stealth kill him. Now, go straight towards the southwestern part of the level. There are going to be guards all around the courtyard so just silently take them all out. After you have, look around the main building for a place with a door. There will be a beehive by the door so that will help you find it. Once you do, go up to it and go through it. Go through the doors and you will eventually find a little hole in the wall. You can go through it so hold R1 and go through. Here comes a loading screen.
You will end up inside a house. Peek out and look around the corners for guards. Take out all of the guards in this courtyard. Then, go around the courtyard looking for a roof/wall without barbed wire on it. Once you do, grapple onto it. Go over the wall and get into the next courtyard. Kill everyone there. Next, look around the courtyard for a big door on the side of a building. Go through it for another load screen.
Now, you are inside the building. You need to take out everyone inside. Go straight and do not kill the lady in the next room. Continue through the rooms. You will come to a hallway with 2 doors in it, one on your right and one straight ahead. Go to the one to the right. Keep going through all of the rooms until you get to a boss fight. This is Tajima. He is pretty easy. Just stick to using combos and blocking whenever you think he will attack. If he is about to shoot at you, start jumping all over the place because you can’t block gunshots.
Now, Head through the next door and the door after that. You are now heading to a new level of the building. Go through the next level much like the first. When you get to the next boss fight, immediately take out the 2 ronins. Keep using combos and keep as far away from Nasu as possible. Once you kill them, go for Nasu. After beating him to death for a while, he might try to give up or something. If he does, do not approach him. Try to get close, but not close enough for him to attack. Immediately start pummeling him and after a while, he will go down.
Mission complete.
Reward for Grand Master: Super Shuriken Reward for Stealth Kills: Shoulder Thrust
Mission 2: Gohda Castle
Recommended Items To Bring Along: Healing Potion, Super Shurikens, Ninja Rebirth
Echigoya’s last words were as informative as they were deadly. There’s a traitor within the castle of Lord Gohda - a man wearing glasses named Hamada. You must dispose of the traitor and return to Lord Gohda. But be careful. Gohda’s guards don’t know of your existence and they will greet you as an intruder. You must not kill any of Gohda’s guards.
This level is easier than it seems. All you have to do is not get spotted. This may sound hard, but it isn’t. If you do get spotted, do not kill any of Gohda’s or you will fail the mission. First, turn around and go get the item. Keep going straight and you will come to a drop. Drop down and you will be in a room and it might contain a guard. If it does, just try not to step on him and always walk in stealth mode. Go out of the room and get on the concrete-like floor. Peek around the corner to the right and when the guard(s) there aren’t looking, rush through. If they see you, just keep running. Keep going straight and keep along the right side. When you see a door, go through it. A cut- scene will commence showing you kill the traitor and showing that ninjas are in the castle and are after Gohda.
Time to kick some ass. First, pick up the key that was dropped by the traitor. Turn backwards and head through the door. A load time will commence. Turn right and go straight. Head left later on and then turn another left into a big room with a tree in it. There will be a guard there so just stealth kill him. Try to rush to the tree when he isn’t looking and just walk around it as he does. Next, turn towards the part of the room where you entered. Walk toward it and turn left before you get into the hallway. There will be a little hole here that you can crawl through on the left so crouch down and go through. Keep going through the tunnel until you reach a big room. Then, go up to the door and press triangle when the key is highlighted.
Go through the door. There is probably going to be a guard there so be cautious. Stealth kill him and go straight. Move upstairs to the second floor. Go through this level like you did the other part of the level. Just peak around corners and stuff like that and you will eventually come to more stairs. Go down them. Go through the next two rooms and go back upstairs. Now, just go through the next set of rooms until you get to the cut-scene, which will mean that is the end of the level. No boss fight here.
Mission complete.
Reward for Grand Master: Exploding Arrow Reward for Stealth Kills: Ninjitsu block
Mission 3: Limestone Caverns
Recommended Items To Bring Along: Healing Potion, Blow Gun, Sticky Bomb
The timing of the Ninja’s surprise attack and retreat made it evident that they intended to keep you from reaching Lord Gohda. The crystal residue found on the Ninjas” clothing indicates that they came from the Limestone Caverns. The rumor within the realm is that the Shichishito, the sword of the deceased Lord Mei-oh, lies in the heart of the limestone Caverns and is attracting evil powers to it. You must go to the Caverns to find the Shichishito Sword.
You will start this level off in a cave. Turn around at the beginning and get the item. Turn back around and run. Jump diagonally to the right and onto the guard tower where an enemy will be. Once you get up there, immediately stealth kill him. There are two enemies on the ground below you, one by the waterfall and one on the other side of the level. Shoot the one by the waterfall with a blowgun or you could risk it and jump down and try to stealth kill him. Either way, when moving through water, always hold down R1. This is very important or the enemies will be alerted of your presence. Now, kill the guy by the waterfall either way and find a way to stealth kill the other guy.
Move deeper into the caverns now. Keep going straight until you pass up all of the wood and stuff and you get to a big room. Do not go in. Press your back against the wall and watch the 2 enemies talk. When they start walking away from each other, go for the one on the wooden planks and stealth kill him. Then, turn around and kill the other one. Move through the cave opening now. Keep moving through until you see another enemy. When he moves out of sight, run and kill him. Keep going straight until you get to a sloped part of your path. There is a pitfall and an enemy ahead of you. If you fall in a pit, you will instantly die. When you do, hold down R1 so you can crouch and keep walking forward. Get up close to the wall, but do not press your back against it. When you get confident enough, jump over the pit and near the enemy. Press square before landing for a sure stealth kill. Next, keep going straight. You will come to an area with 3 enemies, one below you, one in a cave, and one way up high on a ledge. I suggest killing the one below you with a blowgun. Now, try to stay away from the one by the cave. Grapple up to the ledge above and move across it until you see the feet of the enemy. When they turn away, jump up and stealth kill them.
Turn to your right and there will be yet another enemy in front of you. Wait for them to start walking away and they are out of sight. Run towards the spot where they were and jump over the pit. They will most likely be walking back toward you now so drop down into the pit. This actually isn’t a pit, but more of a hole because it has a bottom to it. Hang onto it until the guy starts walking again and stealth kill him. Jump back down into the hole and walk straight. You will eventually come to a big wooden bridge. There is an enemy there on your left so press up against the wall and wait for them to turn away. When they do, stealth kill them.
Now, walk back towards the part where you first got on the bridge. You have to actually walk off of the end of the bridge. This is a long drop, but there is ground below and it is the way to go. Now, walk towards the next cave and wait for the enemy there to turn around. When he does, kill him. Keep going straight. You will come to a big room with a lot of water and stuff everywhere eventually. When you do, creep through it and go to the path on the left. Kill any enemy you see. Keep looking up for a big walkway. When you see it, grapple up to it. Follow it to the boss fight. This is Okinage. He is one of the most famous bosses from the Tenchu games. He has one attack where he will rip at your chest, so stay as far away from him as possible because this attack is very powerful. Just keep using your combos on him. If you have unlocked it from the first level, I suggest using the Shoulder Thrust combo on him. It does wonders. He drinks a health potion whenever he is about to die so when he is low on hit points, do not let him have the chance to drink one. Just keep lobbing him with combos.
Mission complete.
Reward for Grand Master: Chameleon Spell Reward for Stealth Kills: Ninja Vision
Mission 4: Ronin Village
Recommended Items To Bring Along: Health Potion, Blow Gun, Rice Balls
The ninja who assassinated Nasu and saved Lord Gohda was not the real Rikimaru but his shadow. The Azuma Ninjas have shadows that replace them when one was thought to be dead. One year ago, Mei-oh fled into a portal when he was fatally wounded. The true Rikimaru appeared out of the same portal. Lord Gohda’s daughter Kiku has been kidnapped. A letter was left saying she has been taken to the Agamai Castle in a neighboring state. You must go to the Agamai Castle and bring Kiku back. To get there, you must first pass through Ronin Village.
This mission is one of the funnest in the game. You will start off in the level by a bridge that faces the ronin village. You need to crouch immediately because there is an enemy near you to your right kind of. You need to grapple up onto the roof of the house closest to you when the guy is no longer looking. Throughout this level, you will see women like in the first level and a funny-looking little man. Do not kill them and try to stay away from them. You need to move from rooftop to rooftop throughout the courtyard of this level and stealth kill people. Once you kill everyone in the area, move towards the northwest side of the level and you will see a little hole that you can crawl through. Crawl through it and a cut-scene will commence.
The next area is much like the first. There are several houses and a small courtyard that is squared off from the other one. When you start off, you are going to be in water. You need to crouch and walk through the water. There is going to be a guard straight in front of you so you need to wait until turns away and slowly get closer and closer and stealth kill him. Now, move back to where you first entered the level and turn to your left. Go straight and grapple up onto the wall. There might be an enemy near so be cautious. Look straight in front of you and there will be some enemies in the courtyard. You need to go straight towards the big level of concrete where two guards are standing. One is going to be walking up and down the left side and one will be walking left and right on the side where you would have to climb up on. Once they are both looking away, take out the one closest to you and run and get the next one. There might be another guy in the courtyard so take him out too. Once that has been done, look towards the direction where the big wall is opposite of the direction where you jumped over the wall. Now, look to your left and go towards that wall. Move out of the enclosed courtyard and over the wall. Turn right and there will be some enemies. Take them all out silently and then go straight and enter the next area.
Now, you will enter an area with a lot of large kegs. Stay on top of the kegs and scope out all of your enemies. Once you have found all of their locations, take out each enemy one by one. Once everyone has gone down, move to the next gate. You will now be in a huge area with lots of houses and things. Ahead of you is an enemy. Immediately take him out whenever he is looking away. There are going to be lots of civilians in this level so make sure not to kill them. Just move throughout the rest of this area and kill everyone. Move to the northwest part of the level and enter the gate by the big slope.
Mission complete.
Reward for Grand Master: Dog Bone Reward for Stealth Kills: Grappling Hook Combo
Mission 5: Amagai Castle
Recommended Items To Bring Along: Healing Potion, Smoke Bombs, Chameleon Spell, Ninja Rebirth
The Amagai Castle seems abandoned except for some strange wooden robots. Use haste, but be careful Rikimaru. You must rescue Princess Kiku.
This is the hardest level yet and probably one of the hardest in the game. It can get very tricky at times. There are trap doors and lots of pit falls. The enemies in the level aren’t human. They are all made of wood. The Chibots are little wooden enemies with ronin heads. The significance of these little enemies? I do not know. It kind of makes the level stupid in a way. Oh well. On to the walkthrough.
You will start off in a hallway. There is an enemy ahead of you. Look along the wall on the left and quickly run to the part of the wall where you could press your back up against it and be able to look at the enemy at the same time. He will start walking towards you so just stay there and be patient. When he turns around, go out and stealth kill him. Now, go straight. Look above and to the right when you get to a dead end and look for a ledge to grapple to. Grapple up to it and go forward a little. There will be some lava below you, a floor ahead of you, and a floor to the left of you. Use your grappling hook and hook onto the wall where you will be able to land on the floor ahead of you. This will decrease the risk of falling into the lava, which will cause you to lose loads of life. Now, turn left and jump onto the next walkway. Keep going straight and turn to your right. Grapple up to the ledge above.
You will come to a little drop and another ledge right in front of you. Do not fall down right here. Sure there is a floor, but the floor is booby-trapped with spears and it could cause you lots of damage. If you do fall, just grapple back up as quickly as possible. If you don’t just look down again for the enemy below you. Once he moves away, go get him. Keep moving through rooms and watching out for guards and trap doors. If you happen to fall in a trap door, you have to immediately start jumping or you could die. When you get to a room with a risen walkway to your right, there are going to be many trap doors and a guard on the walkway. Immediately jump onto the walkway and just hang there. Move side to side until you see the guard and kill him when you get a chance. Keep going through rooms now. After two or so, you will come to an area that has a trap door and shoots spears from above where the doorway is. There is also a Chibot. When the Chibot turns around, walk up to the spears and when they shoot down, wait for them to rise again. When they do, go through and run and kill the Chibot. Now, you need to use your grappling hook to get up to a ledge above and over the pit. There is another enemy here so be careful when getting up. Kill it too. At the top of the stairs, there is another place to grapple to so grapple again. In the new area, there is a revolving door that you have to put your back on. If it does not turn, that is the wrong wall. Just keep trying the walls in that room until you find it.
When you enter the new room, just keep moving through the areas as usual and kill anyone that you see. Eventually you will come to a drop off on your left and an item on your right. Get the item and drop down. At the bottom of the drop, put Rikimaru’s back up against the wall and enter the next area. That’s two out of the three revolving doors done. Keep moving through the next room and grapple up when you get to the dead end. There are two directions to go now. To the left is a dead end and to the right is a room with a risen walkway. Go right and stand at the doorway of the room with the risen walkway. When you enter that room, smoke bombs and grenades are going to fly out immediately after a door falls and locks you in. You need to grapple up to the risen walkway before this happens. When you get up it, just go into the next room.
Keep moving and grappling now throughout rooms. You will come to a large area with a guard at the end of it. You need to take him out when you get the chance. Move up the stairs and grapple to the ledge after you have taken care of him. Hang there until the guard in front of you moves away and then take care of him. Next, you will eventually come to a pit with a lot of spears and stuff. Don’t fall in. If you do, just grapple back out. Grapple up to the area above the pit. Keep going through this area and grappling up when getting the chance. Keep killing Chibots too.
When you come to an area with wooden rails and walkways everywhere, follow the walkway that has the red rails. Keep going through this part of the level until you come to a room with a guard. Take care of him. Look down and you will see two large gears. If you fall into these, you will instantly die. You need to grapple up to the ledge above you. Do not fall in. The next room is very tricky. One false move and the mission is done for you. There are two very large blades moving up and down and a guard at the other side of the room. The blades are there to either hit you or cut your grappling hook rope thing. You need to grapple to the other side where the guard is without getting caught in the big blades. Just time your grapple correctly and swing. When you land, take care of the guard.
Now, run up the two flights of stairs and you will get to the boss fight. Dr. Kimaira is the next boss. He is a little doctor guy with a big thing on his shoulders. This is where the Sticky Bombs will come into play. You need to land one of them on him. Start hitting him with attacks and when he tries to do a little spinning kick move, detonate the bombs. Repeat the process until he is gone.
Mission complete.
Reward for Grand Master: Invisibility Spell Reward for Stealth Kills: Cling To Ceiling
Mission 6: Cemetery
Recommended Items To Bring Along: Healing Potion, Ninja Rebirth, Smoke Bombs
Ressai explains that there are two ways to repair the Izayoi Sword. One way is to use the steel that Ressai has on hand. The other is to mix in the steel from another sword that’s as strong as the Izayoi, such as the Shichishito. However, mixing in the steel from the Shichishito may have an unpredictable effect on the Izayoi’s power that one cannot predict. The heavens have given you a choice.
This is a very hard level. You are going to always lose health in this mission no matter what. Your sword, Murusama, constantly drains health from you. You will be getting back health by killing enemies though. At the beginning, you have two choices on how to repair the sword. Your choice does not affect gameplay, but only affects two cut scenes towards the end of the game so don’t worry about it that much. Now, lets start the mission.
In your starting area, there are only two enemies and both are rather easy to stealth kill. Just wait for the right moment and take them out. The first one is facing you so just wait until he turns around. The next one is an archer on top of a building. He will be easy to take out. Just go kill him. Then, go into the passageway. Keep moving through the passages and killing enemies. Just wait for an enemy to look away and kill him. Eventually, you will come to the exit. When you exit, a door will drop so you cannot retreat through it if the next fight gets too heated, which it will.
There are around 10 enemies here and they all know of your presence. I suggest taking out the ones that look like screwed up babies first because they can breathe fire and will make this a lot harder if they are still alive. Just keep slashing and slashing until everyone is dead. This will be a hard fight. If you are having a lot of trouble, just jump onto the hut and wait for some to follow suit. Kill them up there. After they are all gone, go straight and jump into that little well/hole thing.
You are back into the wooden passageways. Just go through them and kill any enemies like you did in the first one. You will encounter some floating head enemies and they can be taken out with a few hits, but cannot be stealth killed. The next area has a lot of gnarled trees and enemies. Kill all of the enemies and move on. Back into the wooden passageways. Move through them like all of the last ones. Now, you are finally to the cemetery. There are enemies here that you need to take care of, but there is also an enemy that cannot be killed. You see, there are big hands that come up from the ground and will try to hold you down. If they get a hold of you, you cannot attack. Just try to avoid them and if they start to come up, start jumping. When you get to a fence, climb over it and into the passageway.
This is the last wooden passageway that you will come in contact with. There are lots of dead ends, but none that will make you have to do any major backtracking. Just consult your map when lost. You need to make your way to a room that has lots of blood at the bottom (The Blood Room). You need to hold R1 while passing through it or you will alert enemies. Keep going through it and when you reach the dead end, look up and grapple to the ledge above. Keep moving through the passageway and out to the final outdoor area. You need to get to the gate to end the level so use stealth and stealth kill everyone.
Mission complete.
Reward for Grand Master: Fire Spell Reward for Stealth Kills: Feign Death
Mission 7: Bamboo Forest
Recommended Items To Take Along: Healing Potion, Poison Rice, Ninja Rebirth, Blow Gun
Ayame, another member of the Azuma clan, is imprisoned for attacking Lord Gohda. She was arrested by Gohda’s guards while she was running into the Bamboo Forest. She explains that she is being framed and that the imposter fled into the Bamboo Forest. The imprisoned ninja would rather face the penalties of death rather than have a fellow ninja break her out of prison. Go to the Bamboo Forest and find Ayame’s imposter, but use caution. The forest is infested with ninja demons and Shikigami spirits.
The Bamboo Forest is a pretty easy level to say the least. The level can be completed without exploring most of it so I’m not going to give a walkthrough on the parts of it that aren’t crucial to pass through to complete the level. This level has many spirits and devils throughout it and little to no human enemies although Murusama will not be needed to complete this mission.
You start the mission in a narrow canyon with snow everywhere. There are a few jonins near the starting point and if one is alerted of your presence, they will come to fight. You need to try to stealth kill each and every one of them. If needed, use the blowgun to take them out. After they are gone, continue down the canyon until you come to an area that has multiple paths. Each path leads to the same place so it doesn’t really matter which way you go. Just keep an eye on your Ki meter and you will be fine. Stealth kill anyone that you come into contact with. You need to look around the area that the paths lead to for a little hole that you can crawl into. To reach the next area, go through that hole by holding R1 and moving toward it and make your way through it.
There is a hot spring at the end of this passage. If you are missing health, get into the spring and it will revive you. You need to crouch down in the deepest part to do this. After you are done, move to the next small tunnel that you can access by holding R1 that is in the same area as the one that you exited to get to the springs. You will come out of the tunnel by a bridge. There are spirits and jonins above the bridge so be careful. Dispose of the enemy under the bridge and go towards the large opening.
There are two enemies in this little area. First, go get the item on the left. Then, scope out the two enemies ahead of you. They are going to be facing each other so they will be difficult to stealth kill. Go in the opening on your left go around the little wall on your right. When the two guards get done talking and start walking away from each other, hurry and stealth kill the guy walking towards you when he is close enough. Then, hurry and run and kill the other. After they are both gone, turn left and go up the stairs.
You will come out in a snowy area. Go straight and towards the area with the big snowman. Now, you can either go one of two ways, left or right. Both paths lead to the same place, but the left path is easier so take it. Continue through the path, stealth killing guards, and everything else like you did before until you reach a lighted bridge. Go through the gate ahead of it to reach the boss fight. You are about to fight False Ayame, whom is a clone or something of Ayame.
This boss is extremely hard in my opinion and she has many great attacks, both close and long range. You will start out with two jonins and Ayame to fight. Keep doing Shoulder Thrusts to the jonins and try to keep away from Ayame. Try to treat this fight as the boss fight in the first level. After they are gone, time to kick Ayame’s ass. Lock-on to Ayame and when she comes to attack you, use the quick step maneuver to the side to get out of the way of her strong attacks. When she is open, use the Shoulder Thrust combo on her. Keep using this technique until she is gone.
Mission complete.
Reward for Grand Master: Ninja Armor Reward for Stealth Kills: Wall Kick
Mission 8: Great Buddha Temple
Recommended Items To Bring Along: Healing Potion, Blow Gun, Ninja Rebirth
Counsel Sekiya informs Lord Gohda that Tenrai’s army has taken over the Buddha Temple. Disguised as a temple on the border of Gohda’s realm, the building itself was designed as a fortress to guard the land of Gohda from invading armies. Tenrai’s plan was to keep Rikimaru occupied in the Bamboo Forest, while keeping Ayame in prison so his army could start his attack. Lord Gohda cannot send in his army to take back the temple because it’s holy ground. Doing so would also be a sign of vulnerability to his neighboring states. You must infiltrate the temple and execute the leaders of the enemy’s army.
This level can be tricky. There are guards all over the place and there is even a bear to help them. You don’t really need to kill every enemy to move through this level, but just the necessary ones to let you go deeper into the temple and your mission. On to the walkthrough.
You start off near a cave, some planks of wood, and a guard with a basket on his head. First, you need to run behind a wooden pole to the right of the little area. Stay there and watch your enemy’s pattern. What he does when he is walking away from you is he walks, stops, turns, and then keeps walking again. After he turns around in the middle of his walk, wait for him to turn back around and go kill him. When he is dead, turn around and look up. You will see three big wooden plank things sticking out of the wall. Grapple up to the middle one and go through the crawl space.
When you come out, you will be in a lower level with an enemy inside the cave to your right and an enemy in front of you. You need to crouch down to avoid being seen. When he turns away, go and kill him. Now, turn around and go back onto the lower level. Now, turn to your left and run. There is a little drop in front of you so you need to jump over it onto the boards across from you. Turn around after getting onto it and use the manual camera to look down at the level below. There is a guard there so when he walks the other way, jump down and kill him. When done, grapple back up. Press your back against the cave wall. Look to your left for an enemy that walks up and down that little path. When he is walking away, jump out and kill him. Now, keep going straight and go up the stairs, but do not enter the next room. While on the stairs, press against the wall on your right. You need to look for a guy to turn around and walk the other way. When he does, kill him. Then, go to the ledge that has a drop into the next room. There is a guy in front of you and a guy to the right. You need to sneak around and kill the guy to the right. It doesn’t matter if he sees you or not. Just kill him either way. Next, go take care of the other one when he turns around.
Now go straight. Jump onto the planks and eventually, onto the ground below. Kill the bear with a stealth kill because this is probably harder than most of the bosses in the game. This thing has 250 hit points and is very hard to kill. If you don’t stealth kill it, I suggest retreating until they no longer think you are there. Stealth kill all of the guys in that area. After that, go back to the part where the bear was and look up. You need to grapple up onto the big bars above. Eventually, make your way to the ledge above. There is a guy there with a blowgun that you will have to kill. Press your back against the column and wait for him to walk to the right. When he does, kill him.
Go towards the grayish cave and look up since it is a dead end. There will be a ledge there to grapple to. Grapple up to it. You come to a large area with a platform below and above you. Jump to the one below and get the item. Now, grapple up to the other one and go along the plank and kill the guard. Now, grapple up to the next walkway. There is a pit in front of you. Hook the grappling hook to the roof above the floor and immediately turn to the right and kill that guard. Then, turn around and turn right.
Jump down into the next area. Keep on moving through the passages. When you drop down to the wooden corridor, it looks like a dead end, but look up. It’s not. Grapple up to the area above. You will now come to a boarded up area. Next, perch up on the wooden planks, walk off of it, and move back so that you land on the area right below. Move down the corridor to an area that has a hole that you can crawl in. Keep going until you come to the next area that has a ledge above you. Grapple up and keep moving. When you come outside, take out the nearby guard. There is another bear ahead so try to avoid it. Now, you need to go back into the temple. Look above the hole where you entered the area from for the way. Once you’re inside, move through the corridors and when you are in the main room, drop down to start the boss fights.
There are two bosses to fight now, but not at the same time. Your first is Kagura. There is a giant that hits you instead of her. You cannot kill the giant, so go for the girl. Just keep doing combos to her and she will die eventually. Try to stay as far away from the giant as possible. Next is Tatsumaru. Tatsumaru is probably the second strongest boss, right after Tenrai. He has many powerful close range attacks so try to stay as far away from him as possible. Just keep doing combos to him until he is dead.
Mission complete.
Reward for Grand Master: Fireworks Reward for Stealth Kills: Ninja Mind Control
Mission 9: Tenrai Fortress Part 1
Recommended Items To Bring Along: Healing Potions, Sticky Bombs, Ninja Rebirth, Blow Gun
Two days have passed since the battle at the Buddha Temple. The moon is full and the fog has lifted. Rikimaru, you must go to Tenrai’s Fortress and defeat Tenrai.
This mission is very tough. There are lots of dangers in this level. The enemies seem like they are tougher and there are loads of pitfalls. There are Monks, undeads, and jonins throughout this level. If you don’t want to kill the undead, which would mean not bringing the Murusama sword, you do not have to, but it would help you rack up on the stealth kills.
In the first area, just scan it for jonins and stealth kill anyone you see. Move on to the area with the big log. Move across the log halfway. Scan the area below for all of the enemies and watch the ways they move. Then, jump down to the roof of the house below. Whenever you think you have the best chance, stealth kill one of the enemies and quickly take care of the other one. If you need to, you can always jump back onto the roof after killing one and wait for the other again. There is a health potion on the far side of the building so get it. When everyone is gone, go around the corner. You should always keep an eye on your Ki meter and stealth kill all of the enemies that you come in contact with, but I’m pretty sure you know that already. Keep going until you reach a very large room.
This room has a lot of enemies in it and it will be pretty hard to make your way around it and stealth kill them all, but it is for the best considering that they are extremely hard to fight since they are so strong and they will have other enemies to come and help them. The room’s exit is on the far right side. Just kill all of the enemies and make your way to that part. Ok I will give you a strategy on the guard near the exit. He is standing right by it and will almost never move. What you need to do is, grapple up to the wall along the side of the cave that is to the enemy’s left. Then, press your back against the wall and slowly creep towards him. When he looks to his right a little, go out and stay close to the wall. Run and kill him with a stealth kill.
Now, go through the opening and climb the stairs. These next few rooms contain large guns that overlook the fortress’s outside compound and the areas have lots of enemies. Keep going through the gun rooms and stealth killing all of the enemies. In the next gun room, you need to look for an area above you that you can grapple to. When you see it, grapple up. There will be a monk in front of you so wait until he turns. When he does, take him out. Then move to the left side of the platform. Find the small wooden bridge on the left side and go on it. Continue through the corridors and stealth kill any enemies that get in your way. Continue through the rooms until you reach a room with a female guard in the bottom of it. Use a blowgun to take her out, and then move up the step- like stones. There is a jonin at the top of one of the steps so you need to kill him when you get the chance.
After you do, search the area for the top of a guard tower. Jump onto it or leap to the area below it. Continue in the only direction possible until the boss chamber. You are about to face Okinage, yet again. This is where the sticky bombs come into play. I suggest throwing two onto him at the beginning of the fight. When you get him down to 50 hit points, detonate both of the sticky bombs simultaneously. This will instantly kill him. Before that, just stay as far away from him as possible and do the Shoulder Thrust combo whenever you feel that you have a good chance. Okinage has a lot of powerful close range attacks so just keep away. After that, detonate the sticky bombs like I said before because if you don’t, Okinage will drink a Health Potion whenever he feels that he is low on health and you will have to do it all over again.
Mission complete.
Reward for Grand Master: Decoy Whistle Reward for Stealth Kills: Wrath of Heaven
Mission 10: Tenrai Fortress Part 2
Recommended Items To Bring Along: Healing Potions, Exploding Arrows, Sticky Bombs, Ninja Rebirth, Murusama Sword
This is the last mission in the game. You are still in Tenrai’s Fortress and have just killed Okinage. Time to go for the big dog, Tenrai. He is an old guy with some badass attacks. This level is crawling with enemies and undeads so you will need to bring the Murusama sword with you.
When you start out, immediately grapple up to the ledge above you. As you did in the last mission, you need to move through all of the hallways and kill any enemies that you come in contact with. Keep an eye on your Ki meter as it will help you a lot in this fight. Keep going to an area where there are multiple pathways. All of the paths lead to the same place, but they are slightly different. Just pick one and move through it, killing anyone you see. After patrolling the maze, you come to the exit of this level. Jump to the raised doorway. There are lots of female ninja guards so keep a look out for them.
Keep going until you come to a room with several large pillars in it. Use the grappling hook to reach the first pillar. Then, look around for an opening in the wall that has an item in it. Jump into it get it. Then, jump back onto the first pillar. Grapple up to the other ones and then grapple to the ledge that will let you keep progressing in the level. The next room contains pillars that you have to jump onto. One false step and you will fall to your death. Jump from pillar to pillar and eventually, to the ledge by the wall in front of you. If you want, you could always use the grappling hook instead of making the last jump because it is more of a sure thing. Now, walk down the walkway until you see a jonin. When you do, time yourself right and eventually kill him.
Move around the room and go up the steps, step by step. The next room is a grid that contains a lot of enemies. You should use your Ki meter a lot here. When you get to the staircase, look up and grapple up. Now, grapple up again to the ledge above. Go up the staircase and eventually, you will see an enemy and a gap in the staircase. Try to take him out with a blowgun or a stick bomb or something because you don’t want to have to fight him on such a narrow strip. If you have to fight him, proceed with caution. After he is dead, climb up onto the walkway above. Look to your left and grapple to that side. Kill the guard right by you. Then, go along the walkway and look down. You should see a big drop with an area you can drop to with an item. Drop down and get it. Next, look up the wall to your left. Grapple up to the ledge above. Just keep grappling and jumping around until you get to Tenrai. You should have no further problems until you get to him.
Now you are up to the final boss of the game, Tenrai. He has three phases. Each phase is stronger than the last. First up is his weakest phase that has 150 hit points. I suggest using the Exploding Arrows or Sticky Bombs on him, but don’t use too many. Save some for later phases. In the first phase, he will have several long range and short range attacks. Just keep him locked-on and move around a lot. Use combos to him whenever you feel you have a good chance. After he is dead, here comes the second phase. The second phase is a lot harder and has 200 hit points. Your hits at first will seem as if they are not doing any damage, but after a while, there will be a cut-scene and then they will start to. He seems to block a lot now, but just keep trying to do combos and eventually you will kill him. Use the same techniques as the first phase. Here comes the third phase along with it’s 200 hit points. The third phase is probably the easiest. Just keep using the same techniques as the first and second phase and you will win eventually.
Mission complete.
Reward for Grand Master: Binding Spell Reward for Stealth Kills: Wrath of Heaven
Congratulations! You have beaten the game with Rikimaru!
Ayame’s Walkthrough
At 22, Ayame is a bold, quick, silent, and cunning ninja. She has been trained since childhood. As sharp with her tongue as she is with her sword, Ayame uses an acrobatical style of ninjitsu to overcome obstacles living or dead. She adores Gohda’s daughter Kiku like her own baby sister.
Ayame is a quicker fighter than Rikimaru. Not only can she move and jump better than her male counterpart, but she can hit the enemy with faster combinations as well. The trade-off is that her attacks cause less damage, so she must hit the enemy more to get the same results.
Thanks to the Brady Games guide for Tenchu: Wrath of Heaven for the two above paragraphs.
For a screenshot of Ayame, go to the following website address:
http://tenchu3.de/english/tenchu3/screens/index2.asp? pic=216&pagenum=1&no=223
Just copy and paste both parts of the address into your Internet browser.
Mission 1: Bamboo Forest
Recommended Items To Bring Along: Healing Potion, Caltrops, Sticky Bombs
A villager bursts into tears in front of town officials. He explains that his daughter was abducted as payment for a loan he couldn’t repay. Other village girls have been disappearing in the night as well. Witnesses come forth with news that the village girls were taken to the temple in the Bamboo Forest. Because of the Temple, the Bamboo Forest is considered holy ground and cannot be disturbed by the government and the police. Lord Gohda has no choice but to send you into the Bamboo Forest for silent justice.
This is your first mission in the game with Ayame and it is rather easy. Most of the guards in the level can be stealth killed with ease and the end boss isn’t too hard. The only real problem is that the map can be kind of complicated although it is nothing compared to some of the later levels like Amagai Castle. This is a rather fun mission in my opinion. Well, on with the walkthrough.
You start off on a sloped walkway that leads to a bridge. On the ground below, you see a lot of snow and a guard whom needs to be killed. Watch the guard for a while and when he turns his back to you to start walking in the other direction, run down the walkway and go behind him to stealth kill him. I need you to go do something now. Go to the side of the bridge where the walkway is and look for a glowing hole. See it? Well, it is possible to climb in it. That is the hole that leads to the hot springs. You must remember this for a moment. Now turn around and walk forward until you get to a huge cave. That is just the cave area. I need you to remember these two places.
Now, you have an option of what you want to do here. If you want to rack up a lot of stealth kills and make it easier to fill your Kanji so you can get a new ability, you can go back up to the bridge and follow it all the way until you get to an area that has a passage to the hot springs. When you do, take that passage. You will end up at the beginning of the level. Keep in mind that this is not a necessary thing to do to get the new ability and it is entirely possible to get it without going that way. If you choose to do this, always watch your Ki meter and just use stealth as best as you can.
Your second option is to follow the rest of the walkthrough. Ok I will start the rest now so follow it if you aren’t going to go now or follow it when you get back to the beginning of the level if you choose to go across the bridge. Alright, enter the mouth of the cave slightly, but not much. There are two enemies in this little area. First, go get the item on the left. Then, scope out the two enemies ahead of you. They are going to be facing each other so they will be difficult to stealth kill. Go in the opening on your left go around the little wall on your right. When the two guards get done talking and start walking away from each other, hurry and stealth kill the guy walking towards you when he is close enough. Then, hurry and run and kill the other. After they are both gone, turn left and go up the stairs. Crouch when getting out into the outside again in case there are any enemies around you.
You will come out in a snowy area. Go straight and towards the area with the big snowman. Now, you can either go one of two ways, left or right. Both paths lead to the same place, but the left path is easier so take it. Continue through the path, stealth killing guards, and everything else like you did before until you reach a lighted bridge. Go through the gate ahead of it to reach the boss fight. You are about to fight Tajima.
Tajima is rather easy. He has a gun and a sword and doesn’t attack too often although he does move around and block a good bit. Just stick to using combos and blocking whenever you think he will attack. If he is about to shoot at you, start jumping all over the place because you can’t block gunshots. After he is gone, you have beaten the first mission for Ayame.
Mission complete.
Reward for Grand Master: Exploding Arrow Reward for Stealth Kills: Somersault Kick
Mission 2: Echigoya
Recommended Items To Bring Along: Healing Potion, Caltrops, Sticky Bombs
The mention of Echigoya’s name by Tajima in the Bamboo Forest was proof that Tokubei had inherited the family business after his father was killed. You must infiltrate the Echigoya estate and punish the evil merchant.
You start off on the ground outside of the compound. First, select your Grappling Hook and grapple onto the wall in front of you. Once you get on it, run to the right and then go straight. Keep running along the wall until you come to the northeast corner of the level. Jump down onto the concrete and pick up the white ball, which is a smoke bomb. Now, get back onto the wall. Go straight towards the northwest corner of the level.
When you get there, there is going to be a guard on the ground and a guard above you. Get all the way up against the wall and wait for the guard on the ground to look away. Immediately jump down and stealth kill him. Then, grapple up to the ledge where the other guard is standing. When he is facing away from you, get up there and stealth kill him. Now, go straight towards the southwestern part of the level.
There are going to be guards all around the courtyard so just silently take them all out. After you have, look around the main building for a place with a door. There will be a beehive by the door so that will help you find it. Once you do, go up to it and go through it. Go through the doors and you will eventually find a little hole in the wall. You can go through it so hold R1 and go through. Here comes a loading screen.
You will end up inside a house. Peek out and look around the corners for guards. Take out all of the guards in this courtyard. Then, go around the courtyard looking for a roof/wall without barbed wire on it. Once you do, grapple onto it. Go over the wall and get into the next courtyard. Kill everyone there. Next, look around the courtyard for a big door on the side of a building. Go through it for another load screen.
Now, you are inside the building. You need to take out everyone inside. Go straight and do not kill the lady in the next room. Continue through the rooms. You will come to a hallway with 2 doors in it, one on your right and one straight ahead. Go to the one to the right. Head through this room. Now, Head through the next door and the door after that. You are now heading to a new level of the building. Go through the next level much like the first.
When you get to the next boss fight, immediately take out the 2 ronins. Keep using combos and keep as far away from Nasu as possible. Once you kill them, go for Nasu. After beating him to death for a while, he might try to give up or something. If he does, do not approach him. Try to get close, but not close enough for him to attack. Immediately start pummeling him and after a while, he will go down. After you kill him, run down to the first floor of the building to end the mission. Just go down those stairs from earlier.
Mission complete.
Reward for Grand Master: Invisibility Spell Reward for Stealth Kills: Ninjitsu Block
Mission 3: Gohda Castle
Recommended Items To Bring Along: Healing Potion, Blow Gun, Poison Rice
Lord Gohda nods quietly as you report to him about the three jewels that Echigoya spoke of. However, he makes no mention of it and asks you to forget the conversation. A few months later, a treacherous incident occurs. Hamada, on of Lord Gohda’s men, takes Gohda hostage and demands that the Jewel of Virtue be brought to him. Timed with Hamada’s acts of treason, a mysterious band of Ninjas attacks the castle and takes over every floor. You must hurry to rescue Lord Gohda and dispose of the traitor.
This level is easier than it seems. There are loads of guys on this level and you should have no trouble to get the new ability. You start off in a room with a concrete-like floor. When the level begins, immediately hold down R1 and look for enemies. From the position you were facing when the level started, there was a way to go in front of you and to the right of you. Go to the right. Peek around the corner to the right and when the guard(s) there aren’t looking, rush to them and stealth kill them. If they see you, fight them. Keep going straight and take the left turn. Keep going straight and keep along the right side. When you see a door, go through it. Go through the secret door in the room. It really isn’t secret, but it doesn’t look like a door.
Next, turn left and go straight. Go through the door and kill the enemy in there. Then, go up the staircase. Go through the door. There is probably going to be a guard there so be cautious. Stealth kill him and go straight. Move upstairs to the second floor. Go through this level like you did the other part of the level. Just peak around corners and stuff like that and you will eventually come to more stairs. Go down them. Go through the next two rooms and go back upstairs. Now, just go through the next set of rooms until you get to the cut-scene, which will make the boss fight begin.
This is Hamada. He is overall pretty easy, but he is definitely harder than any enemy that you have faced so far with Ayame. He blocks a lot and attacks even more. Just keep him locked on and dodging his attacks with the R2 + X + L3 move and using combos on him. You will do fine. After he is dead, you are done.
Mission complete.
Reward for Grand Master: Super Shuriken Reward for Stealth Kills: Ninja Vision
Mission 4: Cemetery
Recommended Items To Bring Along: Healing Potion, Blow Gun, Strength Potion
The mysterious voice that emanated from Hamada’s corpse called himself Tenrai. Gohda is shocked that Tenrai knew of the three secret jewels. Long ago, the jewels of Heaven, Earth and Virtue gave the Gohda family the power to control the realm. Two of these jewels were stolen by thieves. The third one, still in Gohda’s possession, is the Jewel of Virtue. With the Jewel of Earth in Tenrai’s possession, Gohda must find the Jewel of Heaven before Tenrai gets his hands on it. But before that, Gohda must prepare for other attacks by Tenrai.By controlling Hamada’s dead body, Tenrai has proven himself to be a master of spiritual powers. Lord Gohda knows that he needs weapons of equal spiritual strength to fight back if Tenrai ever attacks again. Gohda’s family diaries speak of Yoto Swords, which were so spiritually powerful that his ancestors had to seal them in a shrine in the Cemetery to keep them from taking the lives of their owners. To get to this shrine, now an old house, one had to break five sealing stones within the Cemetery. You must go to the shrine in the Cemetery to retrieve the Yoto Swords, but be careful. The spirits blocking your path cannot be hurt by normal swords.
This level is going to be pretty hard. There are undead enemies and ninja enemies in this level. The thing is, you don’t have the right sword to kill the undead so you must not let them know you are there since you can’t take them on. The ninjas, however, can be killed and you will have to kill them. Keep an eye on the Ki meter at all times.
I just want to start off by telling you that if an undead spots you, he will attack you and call over a ninja to help him. When you start the mission, you have an undead enemy near you. Use stealth and roll from tree to tree as you make your way down the path. You need to destroy a Sealing Stone so that you can open up the passageway so look for it and destroy it and make your way into the first passageway. Time to kill some ninjas.
Once you get inside, keep going through it and doing the normal routine, just stealth killing the ninjas and watching the Ki meter. When you get to the Blood Room, wait for a second and read the next part. This next part is tricky. There is an undead in the bottom of the Blood Room somewhere. What you need to do is drop down while holding R1 and move through it while holding R1. If the undead spots you, you can let go off R1 and run. R1 makes the enemy not here you in liquids by the way. Anyways, you need to grapple up to a ledge above on the other side of the Blood Room on the opposite end of where you started.
Now just keep going through the passageway and come out of it. Go into the next area and jump over the large fence. There is a Sealing Stone in the next part of the area. You need to destroy it. Do not move on until you do. After you do, go into the next passageway on the far side of the area. Watch your Ki meter when searching for the Sealing Stone, as there are ninjas in the area. Anyways, when you get in the next passageway, just keep moving and doing business as usual. You will run into some floating head enemies, but you cannot kill them so don’t try. Just keep moving until you get back outside.
The next area has three enemies in it and they are all ninjas. You can easily kill them all with stealth kills. Before exiting this area, make sure you destroy the Sealing Stone. Then, go into the next passageway. Keep going until you get to a huge gap. Grapple to the other side and wait there. Turn and look for an undead and a ninja. Wait for the undead to go on it’s patrol and get out of sight. When it does, grapple back across and go kill the ninja and keep moving. When you get to a dead end, look up for a hole in the roof. Grapple out of the hole and into the next area.
Run to the sealing stone in the middle of the area and destroy it. After that, run to the hut. Here is another boss fight. This headless giant’s name is, well, Headless Giant. He is huge and is carrying his own hand in his hand. This guy is much easier than he looks. He is rather easy considering he almost never blocks. Just keep doing combos to him and dodging his attacks and you will be fine. Even though he has 200 hit points, he will go down in a hurry. After you have beaten the Headless Giant, you have beaten the Cemetery.
Mission complete.
Reward for Grand Master: Chameleon Spell Reward for Stealth Kills: Grappling Hook Combo
Mission 5: Ronin Village
Recommended Items To Bring Along: Healing Potion, Blow Gun, Poison Rice
Two months pass after you retrieve the Yoto Swords. Lord Gohda has sent all of his men to find the Jewel of Heaven before it falls into the hands of Tenrai, but to no avail. An old sage named Zennosuke, who lives in a red house in the Ronin Village, is rumored to know the whereabouts of the Jewel of Heaven. Tenrai’s men also know of this rumor and are already at the ronin village. You must get to Zennosuke before they do.
This mission is one of the funnest in the game. Take note that enemies will always follow you onto rooftops on this level so you need to grapple to places that are too high for them to jump to. You will start off in the level by a bridge that faces the ronin village. You need to crouch immediately because there is an enemy near you to your right kind of and an enemy in front of you on the rooftop of this house. You need to grapple up onto the roof of the house closest to you when the guy is no longer looking and the girl on top of it has turned around. There are lots of enemies in the first part of the level so be cautious. Throughout this level, you will see women like in the first level and a funny-looking little man. Do not kill them and try to stay away from them. You need to move from rooftop to rooftop throughout the courtyard of this level and stealth kill people. Once you kill everyone in the area, move towards the northwest side of the level and you will see a little hole that you can crawl through. Crawl through it and a cut-scene will commence.
The next area is much like the first. There are several houses and a small courtyard that is squared off from the other one. When you start off, you are going to be in water. You need to crouch and walk through the water. There is going to be a guard straight in front of you so you need to wait until turns away and slowly get closer and closer and stealth kill him. Now, move back to where you first entered the level and turn to your left. Go straight and grapple up onto the wall. There might be an enemy near so be cautious. Look straight in front of you and there will be some enemies in the courtyard. You need to go straight towards the big level of concrete where two guards are standing. One is going to be walking up and down the left side and one will be walking left and right on the side where you would have to climb up on. Once they are both looking away, take out the one closest to you and run and get the next one. There might be another guy in the courtyard so take him out too. Once that has been done, look towards the direction where the big wall is opposite of the direction where you jumped over the wall. Now, look to your left and go towards that wall. Move out of the enclosed courtyard and over the wall. Turn right and there will be some enemies. Take them all out silently and then go straight and enter the next area.
Now, you will enter an area with a lot of large kegs. Stay on top of the kegs and scope out all of your enemies. Once you have found all of their locations, take out each enemy one by one. Once everyone has gone down, move to the next gate. You will now be in a huge area with lots of houses and things. Ahead of you is an enemy. Immediately take him out whenever he is looking away. There are going to be lots of civilians in this level so make sure not to kill them. Just move throughout the rest of this area and kill everyone. Move to the northern part of the level and enter the red house.
There are two boss fights in this level and here comes your first, Tesshu, who happens to be the secret character in the game that you can unlock. Tesshu has no weapons except for his fists. Now I know you’re thinking that this guy should pose no threat, but you are very wrong. Tesshu is extremely strong and unfortunately for him, he is extremely slow too. He blocks a lot and seems to attack at every chance he will get. Just keep blocking and pummeling him with combos and you should do fine.
Right after you beat Tesshu, you will have to face False Rikimaru. He is a lot easier than Tesshu was in my opinion. Rikimaru is always on the offensive and seems to never try to block anything. Just keep blocking his attacks and doing combos to him. He will be dead before you know it and the mission will be over.
Mission complete.
Reward for Grand Master: Fire Spell Reward for Stealth Kills: Cling To Ceiling
Mission 6: Amagai Castle
Recommended Items To Bring Along: Healing Potion, Sticky Bombs, Poison Rice
You’ve been caught by Kimaira, and you wake up in a cage. As you prepare for your escape the guard in front of you suddenly shrieks in pain. Tesshu has followed Kimaira there. After seeing that you can escape by yourself, Tesshu tells you that Zennosuke mentioned a secret jewel hidden in the eye of the statue in the Buddha Temple. Then Tesshu disappears.
The mission starts off with a boss fight. You are going to have to fight Kimaira. When you kill him, you will have 20 minutes to get down to the bottom of the castle. This is extremely easy to do if you have already played the game with Rikimaru. Oh well. On to the walkthrough.
This is Dr. Kimaira and his little voodoo statue thing. This guy is kind of hard because of his moves that you cannot block by pressing Circle like that spinning kick move he does. At the beginning of the fight, throw a sticky bomb on him, but don’t detonate it. Start fighting him and when he goes for the move where he does the spinning kick and is coming towards you, detonate it. Keep doing combos to him and trying to dodge his attacks until the fight is over. Use the sticky bomb technique more than once if you think that it would better your odds of winning.
Now after you beat him, you are at the top of the castle and have to run to the bottom in under twenty minutes. If you don’t mission failed. The time limit might as well not even be there. On my first time through the level, I think I got out in around eight minutes. First, go through the door in front of you. When you get to the big blades that move up and down, wait for a second. Those blades will cut your grappling hook wire if they pass over it so you are going to have to be extra careful. Make sure there are no guards near you or on the other side that could make you mess up and take precious aiming for the ceiling below. Wait for the blades to line up good enough to where you have the best chance of landing the grapple and making it across. Take your time for you have a lot of it.
Keep going straight and when you come to the jump that has the gear pit under the ledge that is very near your location, stop for a second. You need to position yourself to where you can jump at an angle that would be kind of to the northeast but diagonally and double jump. Try to guide your fall to the floor. If you think you can make it, you could try to double jump straight and just guide your fall from there. Just be very careful because you will die if you get caught in the gears.
Keep going to the next set of gears. These are a lot easier to jump over so just double jump straight, but before you do, scope out the enemy on the ground below. Try to make it to where you can stealth kill him in the air or if you want, just fight him. Throughout the second floor, just keep going straight through all of the rooms and going down when necessary.
When you come to a dead end, you are most likely near the first revolving door. It is in this dimly lit cell area. Just press R1 near all of the walls to find the right one, and if a cut-scene commences showing Ayame having the wall turn, that is the right one. You could also look at the bottom of the walls for a little gear looking thing that you would think would be used for it to turn on. After you get this revolving door down, move down the hallway. There is going to be an enemy in it by the way. When you get to the end of the hallway, look up and grapple up.
There is another revolving door somewhere near you. Just go through a few rooms and when you come to a dead end, put your back against all of the walls until one works. You will find it. Go through a series of rooms that are guarded and you will eventually come to a dead end, which is really the last revolving door. Just look for it and press your back against walls like the other doors. Keep going straight and you will eventually come to the end of the level. Now you have a decision. Do you want to fight Okinage or not? The only thing that this choice affects is a cut-scene later in the game.
If you do fight him, here is a little walkthrough on how to easily kick his ass. He is one of the most famous bosses from the Tenchu games. He has one attack where he will rip at your chest, so stay as far away from him as possible because this attack is very powerful. Just keep using your combos on him. If you have unlocked it from the first level, I suggest using the Shoulder Thrust combo on him. It does wonders. He drinks a health potion whenever he is about to die so when he is low on hit points, do not let him have the chance to drink one. Just keep lobbing him with combos. After you kill him, mission complete. If you chose not to fight him, you ended the mission right then and there so mission complete for you too.
Mission complete.
Reward for Grand Master: Ninja Armor Reward for Stealth Kills: Feign Death
Mission 7: Great Buddha Temple
Recommended Items To Bring Along: Smoke Bombs, Super Shuriken, Poison Rice, Health Potion
According to Tesshu, the Jewel of Heaven is hidden in the eye of the statue inside the Buddha Temple. Ganda, one of Tenrai’s lords of Darkness, is already at the Buddha Temple with his men. Go to the Buddha Temple, execute Ganda, and retrieve the Jewel of Heaven.
This mission is a really fun one. It is kind of a stealth kill fest. Like other of Ayame’s missions, this mission too begins with a boss fight. This dude is pretty huge too. On to the walkthrough.
You start off and have to fight the Lord of Darkness. This guy is a giant and is very strong. He blocks almost everything and has very powerful attacks. I suggest throwing smoke bombs in front of him at times to confuse him and then attacking. I don’t think you can block this guy’s attacks so you might as well not even try. This guy is really slow and Ayame is really fast so you have one thing up on him. When you think he is going to attack, just get away from him. Keep using combos on him and using items on him such as the super shuriken and smoke bombs and you will be fine.
After the Lord of Darkness is dead, you start off inside a cave. There are two enemies near you. One is in the entrance to the cave and one is on a little bridge. First, go and watch the guy at the entrance of the cave. When you think you have a good chance of killing him, go for it. Now, go take cover behind something so that the other guy will not see you when he comes and inspects the dead body because he will. After he stays in purple mode for a while and then goes back to not caring, go and stealth kill him when you get the chance. Then, run to the little wooden bridge with the poles sticking out of the wall. You will see three big wooden plank things sticking out of the wall. Grapple up to the middle one and go through the crawl space.
When you come out, you will be in a lower level with an enemy inside the cave to your right and an enemy in front of you. You need to crouch down to avoid being seen. When he turns away, go and kill him. Now, turn around and go back onto the lower level. Now, turn to your left and run. There is a little drop in front of you so you need to jump over it onto the boards across from you. Turn around after getting onto it and use the manual camera to look down at the level below. There is a guard there so when he walks the other way, jump down and kill him. When done, grapple back up. Press your back against the cave wall. Look to your left for an enemy that walks up and down that little path. When he is walking away, jump out and kill him. Now, keep going straight and go up the stairs, but do not enter the next room. While on the stairs, press against the wall on your right. You need to look for a guy to turn around and walk the other way. When he does, kill him. Then, go to the ledge that has a drop into the next room. There is a guy in front of you and a guy to the right. You need to sneak around and kill the guy to the right. It doesn’t matter if he sees you or not. Just kill him either way. Next, go take care of the other one when he turns around.
Now go straight. Jump onto the planks and eventually, onto the ground below. Kill the bear with a stealth kill because this is probably harder than most of the bosses in the game. This thing has 250 hit points and is very hard to kill. If you don’t stealth kill it, I suggest retreating until they no longer think you are there. Stealth kill all of the guys in that area. After that, go back to the part where the bear was and look up. You need to grapple up onto the big bars above. Eventually, make your way to the ledge above. There is a guy there with a blowgun that you will have to kill. Press your back against the column and wait for him to walk to the right. When he does, kill him.
Go towards the grayish cave and look up since it is a dead end. There will be a ledge there to grapple to. Grapple up to it. You come to a large area with a platform below and above you. Jump to the one below and get the item. Now, grapple up to the other one and go along the plank and kill the guard. Now, grapple up to the next walkway. There is a pit in front of you. Hook the grappling hook to the roof above the floor and immediately turn to the right and kill that guard. Then, turn around and turn right.
Jump over the pit and then fall in the next hole. This is the way to go. In the next room, there is going to be a huge pit. When you get in, jump to the side of the room. Then, jump on the plank that is right by the side. Then, jump to the side of the room again. You are going to come to a similar looking room. Use the grappling hook to get from side to side. When you get all the way to the end of the pit and on the side, it looks like a dead end, but there is a column that you can grapple up to above you. It may take a few tries, but you will eventually get it.
Once you are on it, look up and keep grappling up a lot. You have arrived at the top when you see wooden walls with red trim. Once you’re inside, keep going straight and watching your Ki meter. When you get to the main room, use your grappling hook to climb up to the right side of the statue. Once you do this, you have completed the mission and a cut- scene will commence.
Mission complete.
Reward for Grand Master: Fireworks Reward for Stealth Kills: Wall Kick
Mission 8: Limestone Caverns
Recommended Items To Bring Along: Healing Potion, Blow Gun, Poison Rice
With two of the three jewels in the possession of Tenrai, Lord Gohda decides that his only chance of winning is to conduct a surprise attack. Gohda’s men are sent across the land to find out where Tenrai is hiding. After a few days, the men gather information that Tenrai has set up a fortress on a nearby island. Any boats would be spotted easily, but a surprise attack could be conducted through a tunnel within the Limestone Cavern that connects the island to the mainland. During the process of gaining this information, Gohda loses half of his army, and Sekiya, his advising counsel, is taken hostage by the enemy within the Limestone Cavern. You must go to the Limestone Cavern and rescue Sekiya. Princess Kiku, lord Gohda’s daughter, hands over her sister’s bells for good luck.
In the room you start off in, there is only one enemy. Kill him when you get a chance. Move through the cave opening now. Keep moving through until you see another enemy. When he moves out of sight, run and kill him. Keep going straight until you get to a sloped part of your path. There is a pitfall and an enemy ahead of you. If you fall in a pit, you will instantly die. When you do, hold down R1 so you can crouch and keep walking forward. Get up close to the wall, but do not press your back against it. When you get confident enough, jump over the pit and near the enemy. Press square before landing for a sure stealth kill. Next, keep going straight. You will come to an area with 3 enemies, one below you, one in a cave, and one way up high on a ledge. I suggest killing the one below you with a blowgun. Now, try to stay away from the one by the cave. Grapple up to the ledge above and move across it until you see the feet of the enemy. When they turn away, jump up and stealth kill them.
Turn to your right and there will be yet another enemy in front of you. Wait for them to start walking away and they are out of sight. Run towards the spot where they were and jump over the pit. They will most likely be walking back toward you now so drop down into the pit. This actually isn’t a pit, but more of a hole because it has a bottom to it. Hang onto it until the guy starts walking again and stealth kill him. Jump back down into the hole and walk straight. You will eventually come to a big wooden bridge. There is an enemy there on your left so press up against the wall and wait for them to turn away. When they do, stealth kill them.
Now, walk back towards the part where you first got on the bridge. You have to actually walk off of the end of the bridge. This is a long drop, but there is ground below and it is the way to go. Now, walk towards the next cave and wait for the enemy there to turn around. When he does, kill him. See that cell? Go up to it and release Sekiya. Now we must get some explosives. Go straight and when you get to an area that has some large kegs that prevent a crawlspace, move up and stealth kill the guard. Then, move the kegs and go get the explosives. Now, keep going straight. You will come to a big room with a lot of water and stuff everywhere eventually. When you do, creep through it and go to the path on the left. Kill any enemy you see. Keep looking up for a big walkway. When you see it, grapple up to it. Follow it to the next area. Kill the enemy here. When you arrived, look in the direction that is to the right of that. See that big boulder? Just go up to it, place the explosives, and run.
Time for a boss fight. This is Kagura and Spirit Wolf. They are rather easy. You just have to keep clear of Spirit Wolf and always go and try to attack Kagura. If you have any, try some sticky bombs. These work well. If you get tired of Spirit Wolf attacking you, kick his ass. After you kill Kagura, the mission is over. Note that Spirit Wolf is not required to be killed.
Mission complete.
Reward for Grand Master: Dog Bone Reward for Stealth Kills: Ninja Mind Control
Mission 9: Tenrai’s Fortress Part 1
Recommended Items To Bring Along: Ninja Rebirth, Healing Potions, Invisibility Spell, Kasumi and Shizuku
After the battle with Kagura, you return to lord Gohda to report the situation regarding the tunnel and Sekiya. Lord Gohda thanks you for your courage and decides to hold a strategy meeting with his men. He returns a few hours later. The plan is to send you in to kill the leader from the inside. You must infiltrate the fortress and eradicate the enemies from within.
This mission is very tough. There are lots of dangers in this level. The enemies seem like they are tougher and there are loads of pitfalls. There are Monks, undeads, and jonins throughout this level.
In the first area, just scan it for jonins and stealth kill anyone you see. Move on to the area with the big log. Move across the log halfway. Scan the area below for all of the enemies and watch the ways they move. Then, jump down to the roof of the house below. Whenever you think you have the best chance, stealth kill one of the enemies and quickly take care of the other one. If you need to, you can always jump back onto the roof after killing one and wait for the other again. There is a health potion on the far side of the building so get it. When everyone is gone, go around the corner. You should always keep an eye on your Ki meter and stealth kill all of the enemies that you come in contact with, but I’m pretty sure you know that already. Keep going until you reach a very large room.
This room has a lot of enemies in it and it will be pretty hard to make your way around it and stealth kill them all, but it is for the best considering that they are extremely hard to fight since they are so strong and they will have other enemies to come and help them. The room’s exit is on the far right side. Just kill all of the enemies and make your way to that part. Ok I will give you a strategy on the guard near the exit. He is standing right by it and will almost never move. What you need to do is, grapple up to the wall along the side of the cave that is to the enemy’s left. Then, press your back against the wall and slowly creep towards him. When he looks to his right a little, go out and stay close to the wall. Run and kill him with a stealth kill.
Now, go through the opening and climb the stairs. These next few rooms contain large guns that overlook the fortress’s outside compound and the areas have lots of enemies. Keep going through the gun rooms and stealth killing all of the enemies. In the next gun room, you need to look for an area above you that you can grapple to. When you see it, grapple up. There will be a monk in front of you so wait until he turns. When he does, take him out. Then move to the left side of the platform. Find the small wooden bridge on the left side and go on it. Continue through the corridors and stealth kill any enemies that get in your way. Continue through the rooms until you reach a room with a female guard in the bottom of it. Use a blowgun to take her out, and then move up the step- like stones. There is a jonin at the top of one of the steps so you need to kill him when you get the chance.
After you do, search the area for the top of a guard tower. Jump onto it or leap to the area below it. Continue in the only direction possible until the boss chamber. You are about to face Tatsumaru, who in my opinion, is one of the hardest bosses of the game. Tatsumaru is fast, but Ayame is faster so use that to your advantage. I suggest throwing sticky bombs on him and detonating them if you want to make this much easier. Try to not stay too close to him and block anything he throws at you. Just keep using your combos and or items to your advantage. When he is dead, you have won.
Mission complete.
Reward for Grand Master: Decoy Whistle Reward for Stealth Kills: Wrath of Heaven
Mission 10: Tenrai’s Fortress Part 2
Recommended Items To Bring Along: Ninja Rebirth, Healing Potions, Invisibility Spell, Kasumi and Shizuku
Here it is, the last mission in Ayame’s campaign. This mission, in my opinion, is actually easier than Part 1 of Tenrai’s Fortress. We will see I guess. On to the walkthrough.
When you start out, immediately grapple up to the ledge above you. As you did in the last mission, you need to move through all of the hallways and kill any enemies that you come in contact with. Keep an eye on your Ki meter as it will help you a lot in this fight. Keep going to an area where there are multiple pathways. All of the paths lead to the same place, but they are slightly different. Just pick one and move through it, killing anyone you see. After patrolling the maze, you come to the exit of this level. Jump to the raised doorway. There are lots of female ninja guards so keep a look out for them.
Keep going until you come to a room with several large pillars in it. Use the grappling hook to reach the first pillar. Then, look around for an opening in the wall that has an item in it. Jump into it get it. Then, jump back onto the first pillar. Grapple up to the other ones and then grapple to the ledge that will let you keep progressing in the level. The next room contains pillars that you have to jump onto. One false step and you will fall to your death. Jump from pillar to pillar and eventually, to the ledge by the wall in front of you. If you want, you could always use the grappling hook instead of making the last jump because it is more of a sure thing. Now, walk down the walkway until you see a jonin. When you do, time yourself right and eventually kill him.
Move around the room and go up the steps, step by step. The next room is a grid that contains a lot of enemies. You should use your Ki meter a lot here. When you get to the staircase, look up and grapple up. Now, grapple up again to the ledge above. Go up the staircase and eventually, you will see an enemy and a gap in the staircase. Try to take him out with a blowgun or a stick bomb or something because you don’t want to have to fight him on such a narrow strip. If you have to fight him, proceed with caution. After he is dead, climb up onto the walkway above. Look to your left and grapple to that side. Kill the guard right by you. Then, go along the walkway and look down. You should see a big drop with an area you can drop to with an item. Drop down and get it. Next, look up the wall to your left. Grapple up to the ledge above. Just keep grappling and jumping around until you get to Tenrai. You should have no further problems until you get to him.
Now you are up to the final boss of the game, Tenrai. He has three phases. Each phase is stronger than the last. First up is his weakest phase that has 150 hit points. I suggest using the Exploding Arrows or Sticky Bombs on him, but don’t use too many. Save some for later phases. In the first phase, he will have several long range and short range attacks. Just keep him locked-on and move around a lot. Use combos to him whenever you feel you have a good chance. After he is dead, here comes the second phase. The second phase is a lot harder and has 200 hit points. Your hits at first will seem as if they are not doing any damage, but after a while, there will be a cut-scene and then they will start to. He seems to block a lot now, but just keep trying to do combos and eventually you will kill him. Use the same techniques as the first phase. Here comes the third phase along with it’s 200 hit points. The third phase is probably the easiest. Just keep using the same techniques as the first and second phase and you will win eventually.
Mission complete.
Reward for Grand Master: Binding Spell Reward for Stealth Kills: Wrath of Heaven
Congratulations! You have beaten the game with Ayame!
Tesshu’s Walkthrough
Tesshu Fujioka is a doctor by day and a cunning hired assassin by night. He differs from Ayame and Rikimaru in several ways. Most importantly, he’s much slower than Ayame and somewhat slower than Rikimaru, and he’s more powerful than either of them.
Thanks to the Brady Games guide for Tenchu: Wrath of Heaven for the above paragraph.
For a screenshot of Tesshu, go to the following website address:
http://tenchu3.de/english/tenchu3/screens/index2.asp? pic=222&pagenum=1&no=223
Just copy and paste both parts of the address into your Internet browser.
Mission 1: Echigoya
Recommended Items To Bring Along: Healing Potion, Smoke Bomb, Throwing Needle
When the law fails to serve justice, one can buy justice. Underground groups offer assassinations at reasonable prices, but they only take on missions that they agree will serve justice. This is the story of Tesshu Fujioka, a doctor by day, a hired assassin by night. It’s a warm spring evening when Tesshu is ordered to murder Nasu and Echigoya. Both are guilty of kidnapping village girls and selling them as slaves to neighboring states. The families of the daughters feel that the officials won’t punish Nasu because he’s a high-ranking statesman. Both Nasu and Echigoya must die.
You start off on the ground outside of the compound. First, select your Grappling Hook and grapple onto the wall in front of you. Once you get on it, run to the right and then go straight. Keep running along the wall until you come to the northeast corner of the level. Jump down onto the concrete and pick up the white ball, which is a smoke bomb. Now, get back onto the wall. Go straight towards the northwest corner of the level. When you get there, there is going to be a guard on the ground and a guard above you. Get all the way up against the wall and wait for the guard on the ground to look away. Immediately jump down and stealth kill him. Then, grapple up to the ledge where the other guard is standing. When he is facing away from you, get up there and stealth kill him. Now, go straight towards the southwestern part of the level. There are going to be guards all around the courtyard so just silently take them all out. After you have, look around the main building for a place with a door. There will be a beehive by the door so that will help you find it. Once you do, go up to it and go through it. Go through the doors and you will eventually find a little hole in the wall. You can go through it so hold R1 and go through. Here comes a loading screen.
Peek out of the door a little of the shack that you end up coming out of. Look to your left. There will be a guard lying down on a blanket. Go up behind him and kill him, but make sure there is no one else around first. Take out anyone else in the courtyard. Now, look around for a part of the fence where there is no barbed wire. You need to climb over it. Run all the way to the right side of the non-barbed wire fence. Look for guys around there to kill. You see that huge house in front of you? You need to get to the other side of it so hop on the roof and walk over it and drop down on the other side after making sure there are no guards around. Look for the door all the way on the right on that side of the building.
Once you are inside, we have to start looking for a key. Turn on your map. You need to get to the room all the way on the lower-left corner of the map. Kill the guy in there and get the key. Next, go through rooms and killing people. Just do the normal routine until you get to the locked door. Unlock it with the key and make your way to the basement. Grapple up to the room that leads to the staircase and keep going straight. Go up the staircase when you reach it. Keep going from room to room doing the normal routine, watch the Ki meter and kill. When you get to a room with a cat, get in Stealth mode and get as far away from it as possible. Go past it and go through the crawl space. Now, grapple up to the wooden ledge above at the end of that room. Now, just make your way to Nasu. Just keep going straight and you will reach him. Kill anyone that crosses your path.
Once you enter the battle, immediately try to kill the ronins. I suggest throwing a smoke bomb down to confuse them. Now, just kick their asses. Keep using combos and keep as far away from Nasu as possible. Once you kill them, go for Nasu. After beating him to death for a while, he might try to give up or something. If he does, do not approach him. Try to get close, but not close enough for him to attack. Immediately start pummeling him and after a while, he will go down. Just keep using the same maneuvers over and over. Combo after combo will get you victory.
Mission complete.
Reward for Master of Assassins: Super Needle
Mission 2: Gohda’s Castle
Recommended Items To Bring Along: Healing Potion, Blow Gun, Throwing Needle
Nasu was killed by another assassin. This truly bothers Tesshu. He doesn’t sleep well that night. Tesshu’s curiosity about Gohda’s Ninja’s escalates because Zennosuke keeps telling him to forget about it. He says that crossing swords with the Azuma is the same as suicide. But Tesshu is still angry that he couldn’t collect his fee because Rikimaru got to his target first. Ignoring Zennosuke’s advice, Tesshu sneaks into Gohda’s Castle to find Rikimaru and prove to himself that he is the better assassin.
In the next mission, you are going to want to get the most number of stealth kills possible. It will really help you in this mission to stay hidden from your enemy. Just use as much stealth as you can and you will do fine. Keep an eye on your Ki meter throughout the duration of this mission.
If you have already played through the game with Rikimaru, go to the room where Rikimaru killed Hamada (asking since you might have used cheats). It is the long room on the right side of the map. If you haven’t already played with him but played with Ayame, get to the part of the level where there is concrete on the ground and there is a hallway that you can enter in front of you and to the right of you. It is almost near the starting point of the level. After getting there, get in position where you can see a hallway in front of you and to the right. Take the one to the right and keep going straight. Keep on the right side of the hall so a door will open when you near it. This is the door to go in. When you get inside, go through the secret door. Just look for it and you will see it after a minute.
When you come out, you will end up near a staircase that leads to the second level of the level. Move through the two rooms, kill the guard by the staircase, and go up the stairs. Remember the part of the level where you were supposed to go to end the level to fight Hamada as Ayame? Well, you need to get to that room. Just keep going through the rooms and stealth killing. You should have no problem at all of finding it because it is a very straight-on path. If you get lost, consult the map. The room you are looking far is on the opposite side of the map from where you entered the second level.
After you get to the room, a boss fight will commence. You have to fight Rikimaru. Rikimaru is pretty easy in my opinion. He is faster than Tesshu, but not as strong. Just keep blocking his attacks and using combos on him. You will eventually kill him. The fight will end when Rikimaru gets down to 50 hit points so it won’t be that hard. Just watch out for his leg sweep. That could mess you up. If you see him going for it, try to move out of the way. Oh and one more thing, smoke bombs are extremely effective on Rikimaru. If you have any, throw some down and then start pummeling him with attacks. Soon, the fight will be over.
Mission complete.
Reward for Master of Assassins: Kumihimo
Mission 3: Buddha Temple
Recommended Items To Bring Along: Strength Potion, Healing Potion, Throwing Needle, Blow Gun
Six months after Tesshu’s failure to kill Nasu, he takes on a new mission. He’s hired to kill Ganda, the head of a new religious cult that has taken over the Buddha Temple on the border of Gohda’s realm. Ganda took part in the plan to sell village girls to neighboring states as slaves, but he escaped justice because of his religious profession.
Like when you played through this mission with Ayame, this mission begins with a boss fight. You have to fight Ganda, who is a freaking giant. This dude is huge. Anyways, he can be as bad as he looks. Attacks don’t seem to take as much off of him as they would on other people. He also happens to have 200 hit points, which doesn’t help you that much.
This guy is terribly slow. He is even slower than Tesshu. When he is about to attack you, you can usually tell so you need to try to run in the opposite direction because he has a large attack range because of his long arms and legs. When he attacks, just move away and then hurry back and pummel him with hits. Smoke bombs are very effective on him if you have any. I don’t think you can actually block this guy’s attacks so you might as well not even try. Just keep using the method I said about when he is going to attack and beating the hell out of him with combos. It might take a healing potion to help you with your cause, but he will soon be dead. After he is, time for the level to begin.
Move from the scaffolding to the walkway, and go through all of the corridors. This doesn’t actually lead to a way out, but it helps with stealth kills. Keep killing guys and watching your Ki meter. Try not to get into any one-on-one fights because this will cause other guards to come and help. Anyways, keep going until you drop down to the main floor, which isn’t too far ahead. Just keep going straight. Run around the right side of the statue to find the way out of this area. Now you are about to be outside, but beware, there is a big ass bear just waiting to gnaw you to death. Do your best not to alert it. If you do, run as fast as you can. Eventually make your way to the exit and kill the guard by it. Drop down there.
Any enemies that are still alive from the last area will follow you and this includes the bear so do not waste time. Keep moving. When you come to the big pit with only a board at the bottom, turn around and look up for a place to grapple to. It will be tricky to get up there, but that is the way to go. After getting out of there, go into the temple area. Kill the guy near you and grapple up to the beams above you. Keep continuing. You are going to come to another pit. Jump from side to side of it until you come to the edge of it. Then, use your grappling hook to get on top of a tall pillar. Now move into the next room. There is going to be a wooden bridge somewhere in there. Jump over to it and kill the guy that you are going to have to fight. Then, grapple back up to the place where you jumped. Look for a way out at the top and then grapple when you see it. The next room is going to have a lot of bridges on a pit. Jump down there and kill the guard. To your right will be the exit and go.
Mission complete.
Reward for Master of Assassins: Magazine
Mission 4: Limestone Caverns
Recommended Items To Bring Along: Healing Potion, Smoke Bomb, Throwing Needle
Tesshu is very surprised to see Jinnai, a former member of Muzen, the same underground organization that Tesshu belongs to. When Tesshu wakes up, he is in a prison cell. All of his tools for his midnight job have been confiscated. Tesshu must get his tools and escape.
Tesshu is about to spend a while in a cell. He gets locked up and loses all of his items. He is going to bust out and you have to recover them and then leave the caverns. This is going to be a rather easy mission compared to the last one and the ones ahead of this. All of the items are in these little cell and they have a good amount of guards around it. Don’t worry though. Just keep an eye on that Ki meter.
You are going to start out in a cell with a guard just a few feet from you. Press your back against the wall and when you think the time is right, circle it and run and kill the guard. Now, we need to look at the map so press Select. Look for little red dots. Those are your missing items that you need to get. They are pretty close and they are in a cell like the one that you were in. Go towards the first one. It is going to be by a crawlspace by a bunch of barrels. You need to kill the enemies around the cell and then go get it. That was the only thing you had to get.
Now pull up the map again. You need to get to the exit of the caverns. The exit is in the room at the upper-right corner of the map. It should be very easy to get there since you are going in a straight line after all. Keep going until you get to the room with a lot of water everywhere and has the risen walkway. There are going to be a lot of ninjas in there so be ready. I suggest shooting them with the blowgun or you could just try to kill them yourself. Either way, you need to get on top of that risen walkway in that room. When you do, just follow it to the exit.
Mission complete.
Reward for Master of Assassins: Fire Arrow
Mission 5: Cemetery
Recommended Items To Bring Along: Healing Potion, Smoke Bomb, Throwing Needle
A cold shiver goes down Tesshu’s spine. It’s intuition, a gut feeling that something truly bad is about to happen. Tesshu hates himself for feeling these things in advance. He must hurry to the hut in the Cemetery, because Senkichi is waiting there to pay him for his services.
Unlike the time that you had to play through this mission with Rikimaru and Ayame, you have no undead foes. Everyone is alive and out to kill you. There are lots of enemies on this level and you should keep an eye on your Ki meter at all times for it will save your life.
At the starting point, just move down towards the first passageway and keep an eye on your Ki meter like I said in the above paragraph. Enter the first passageway and make your way through it and doing business as usual. Just kill and keep an eye on the Ki. Eventually, make your way to the Blood Room. When you get there, look down there for a jonin. You need to kill him with a blowgun dart if possible because he is going to go kamikaze on you if he sees you. He has his pockets loaded with grenades and wants to die. Just try not to get in contact with him.
After you kill him, exit the Blood Room by going to the other end of it and grappling out. There is going to be a jonin right at your hands when you are hanging from the ledge of the exit from the Blood Room so be ready. He won’t try to blow himself up though so don’t worry. Just get up there and kill him. After you do, keep going until you exit the passageway. You need to go through here and jump over a fence to the other side. Just look for the fence and kill everyone that crosses your path. After you jump over it, move through the area to the next passageway. Just go straight through this set of passageways and kill anyone you see. Stop when you come to the exit of the passageway.
There are three guards out here. You can easily kill them all without a fuss. Just go and kill them. Make your way to the next passageways. Keep going until you get to a dead end and look up. There should be a hole there. Grapple out of it. When you get up, look for a hut and run to the front of it. That is the end of this mission.
Mission complete.
Reward for Master of Assassins: Disguise
Mission 6: Ronin Village
Recommended Items To Bring Along: Blow Gun, Smoke Bomb, Disguise, Health Potions
Senkichi is dead. Tesshu knows that it had to be Jinnai, the only one who knew about the secret handoff point for payment. Zennosuke will know what to do. Tesshu rushes to the Ronin Village to meet with him. The village is infested with Jinnai’s men.
This is Tesshu’s final mission. You are on your way to find the end boss so be ready. This mission is full of enemies and it is a lot of fun to kill them all. This is the funnest mission for Tesshu probably. You will have a stealth kill fest. Have fun.
You are going to begin at the gate of the Amagai Castle. Turn left. See that building? You need to get on the other side of it and enter it to talk to Zennosuke. That is your objective for now. Just kill any guy that poses a threat to you that is in front of the house and then go in. After the cut-scene, you need to get to the door that leads to the next area. It is at the other side of the map from the house and is on risen land. Just make your way to it and stealth kill anyone that poses a threat to you.
Now you are in the Keg Area. You don’t actually have to kill anyone in this area, but you could if you want. If you don’t want to, just hop from keg to keg until you get to the exit and go through the next gate. If you do, just be careful and make your way to the gate after. From here, go straight. You need to kill all of the enemies on your way too. Go straight until you reach some water. Then, follow the water to a crawlspace that would have been on the opposite side of the map from you. If someone is chasing you, do not enter the crawlspace or they will blow you up.
Now you are in the final area. You need to go look for Ukyo who is leaning up against a hut or something. He is a Chinese guy with a big hat on and he looks like someone that you would see in some old Chinese movies. Approach him to start the final battle of Tesshu’s campaign. This guy is pretty tough. He is very quick and powerful. He blocks a lot and is very hard to hit. He also has a really long stick so that means that he has a large striking range. Blocking will be your best friend in this fight. Just take your time and block, hit, block, hit, and etcetera. This is how you will win this fight. If you still have some, I suggest using your smoke bombs to distract him.
Mission complete.
Reward for Master of Assassins: Bamboo Gun
Congratulations! You have beaten the game with Tesshu!
Bonus Missions
In the Bonus Mission section, I am going to give walkthroughs for the demo and a walkthrough for Through The Portal. Both of the levels force you to play as Rikimaru.
Unlock Bonus Stage
At the Title Screen press: L1, Up, R1, Down, L2, Right, R2, Left or you could beat the game with all three characters.
Unlock Demo Level
At the Start Screen, press Up, Down, Right, Left, X, X, X.
Bonus Mission: Demo Level
Now, turn left and go straight. After like 2 steps, a cut scene will commence showing a burning tower-like thing fall. Don’t pay attention to it. Keep going straight and you should be in between a wall and a building. Keep going straight but go very slowly for you will meet your first enemy ahead. When at the opening, look around the corner and there will be a yellowish looking dog. When it is turned around, run and press Attack near it. This will get you your first stealth kill! Now turn around. You should be facing the wall.
See that red box over by the wooden planks stacked against the wall? Go over to it and pick it up. This will give you invisibility for a while. Now, turn back around and go towards that big wooden box near a building. Get the red thing by it. This is more healing potion. Now use your grapple hook by picking the item farthest to your right in your inventory like thing on the screen. When selected, hold triangle and point it towards the white building directly across from the box and point the grapple towards the roof.
When it is on the roof, let go of triangle and let the grapple beam hook on. This will cause you to fly on top of the roof. Now, get the red box in the middle of the roof and now you have sticky bombs. Now, turn around and hop down from there onto the ground below. See that big box again? Well, hop onto it and then onto the roof of the house right by it. Continue walking down the roof until you get to a guard. When he is turned around, hop off and press attack.
If he didn’t see you, this will cause you to do a stealth attack. Now, turn to your right and you should see a ramp. Go up it but do not go all the way up for there is a guard up there and he cannot see you. Press against the wall by the ramp and when the guy turns around, quickly jump up to ground level and go and stealth attack him when close by pressing R1 and Square. Now, walk over him to pick up his spear. After that, walk off of the edge of the ground and go straight.
You should be in between two buildings. Go through them and drop down to the ground below. Look near the red house and you should see a guard and an unarmed man. When the guard and the unarmed man are both turned, quickly run to the guard and kill him. Now go for the unarmed man. Now, keep going straight where you killed the unarmed man and you should see a big hill like thing that you can go up. There is a guy with a bow and arrow up there. You need to climb onto the edge of it and wait for him to turn around. When he does, kill him and take the bow and arrow. Now you have a bow and arrow!
Now, go back towards the building where you killed your first human. When you are in front of it and are near where the first guard you killed was standing, turn and look at the courtyard where the unarmed man and the guard were. Jump down onto the ground below and you should see some vase looking things around there. Break them and get the item there. It is more healing potion. Now, go towards that red thing by that building in front of you and break the vases there and get that pick-up. Now head back to that red house in the courtyard. Go towards the door and a cut scene will commence.
After it, you will need to take care of two guards that are charging after you. Hurry and kill them with sword combos and such. After that, here comes the boss fight! The boss is a guy wearing red and has a sword and a gun. You need to avoid the sword as much as possible. Just keep doing sword combos on him and he will eventually die. If you need more health, just use the healing potion. Congratulations for you have beaten the demo!
Mission complete.
Bonus Mission: Through The Portal
As the castle collapses, the only way to escape is to jump into the portal that Meioh flees into. Inside the portal is another universe - a world in which a large biotech pharmaceutical company has created a deadly disease and sold the cure at a substantial profit. Many civilians couldn’t afford the cure and died. The government’s auditing of the company’s accounting procedures led to the unveiling of a huge fraud, but the CEO bribed his way out of jail. You must punish this evil CEO!
Through The Portal takes place in the future. The point of the mission? You are supposed to kill an evil CEO of a pharmaceuticals corporation who got people sick or something just so he could sell them the antidote. The level is flooded with guards and stuff that are cops. Well, on to the walkthrough.
Go straight a little and peek to the left around a wall. You should see a guard. When he starts to walk up the stairs, run over to him and kill him. After you have, run back down the stairs. At the feet of the stairs, turn left and walk straight. When you see a ledge on your left side, grapple up to it, but do not climb up. There will most likely be a guard there. If not, go up and hug the wall on the left and peek around the corner to watch the guard. Kill him whenever you think you have the best chance.
After that, go straight. There is going to be a guard near the entrance of this door so be cautious. When he turns around, kill him. Look in front of you and you should see a small walkway by a bunch of machines and pipes. Go in it a little and peek to the right. There will be a guard there that is walking up and down a walkway. When you think you have the best chance, stealth kill him. Now, go out the door and get on the walkway. Look to your left after you get on it and there will be a guard. Kill him any way that you can. Then, turn and go the other way. Once you start nearing a fence, look to the left and up and you should see a ledge. Grapple up to it and then walk to where you have passed the fence.
There will be a guard down there. Jump on the risen walkway above him and when you get the chance to, take him out. Next, go to the next fence and face the wall on the right. Grapple up to the ledge above you. Look around up there for a crawlspace and go through it. In the next area, there are three cops. When you enter it, turn to the left to where you are seeing the long part of the room. Now I can tell you the guard locations. There is one walking around in the middle, one to the right of the room near a pillar and carrying a gun, and one that is walking from left to right way in front of you.
Above you is a walkway. I suggest grappling up to it and jumping down on each enemy one at a time and repeating the process. This is the easiest way to do this. If you don’t want to, you really don’t have to kill them. Anyway, after you kill them all, get on the walkway above you and follow it to the crawlspace and go through it. When you come out, there will be a guard right by you so stealth kill him right when you see him.
Follow the hall to the elevators and kill the guards by them. Go in the elevator on the right. When you get to the next floor, kill the guard that is walking up and down the hall. After that, enter the doors. Here is the boss fight. The evil CEO is your enemy here. This guy is pretty damn hard and very strong. He is packing 250 hit points. He blocks a lot and seems near impossible to hit. He has a lot of powerful attacks too. Don’t get too close to him and always be ready to dodge and block things. When you get the chance, go in for combos. If you still have any caltrops left, run away from the CEO and drop them. Keep running and he will follow you. When he steps on the caltrops, go in for a combo. This is a pretty effective method for defeating him. When you kill him, you win.
Mission complete.
Congratulations! You have beaten all of the bonus missions!
Co-Op Walthrough
To unlock more missions, you need to beat more missions in the story mode.
Mission 1: Village
There are a few lost scrolls that you need to obtain. They are scattered throughout the level and the point of the level is to get them. Enemies will also pick up the scrolls so you need to kill anyone that picks them up.
This level is very fun. It looks just like the first section of the ronin village level in the story mode. On this level, I suggest not going anywhere by foot. Make your way through the level by going from rooftop to rooftop. Also, have you and your friend split up. Then, just go around the level and pick up all of the scrolls. Also, enemies can pick up more than one scroll. Use your map to find the scrolls. Try to stealth kill all of the enemies because they will call for back up and you don’t need all of the level’s enemies after you at once. Rely heavily on the grappling hook.
Mission complete.
Mission 2: Battleground
Lord Gohda has been wounded on the battleground and will not survive another hit. You need to fight through all of the enemies and get to him. Then, you have to save him and escort him to the safe area.
The best strategy to use is to have one player stay with Lord Gohda at all times and fight anyone that comes. Then, have the other player run ahead and clear the path of enemies. Sure this won’t be as fun for one player so just switch turns.
There are archers that are hiding behind fences that will fire at Lord Gohda. Have the guy that is clearing the path go and kill them all. Have the guy that is staying with Lord Gohda take care of the rest of the baddies. After you get to the safe area, you are done.
Mission complete.
Mission 3: Castle
This mission can be very hard if you are playing with someone who likes to fight and doesn’t take their time when progressing through levels. You have to stealth kill everyone in this level. If you get seen even once, the mission is failed.
Some of the areas might require you to kill two enemies that are very close to each other and would be impossible to do with just one person. If so, just take your time and both of you kill them when you both agree that you have a good chance of making the kills. You need to just go through the level and get to the end to beat it. After that, you are done.
Mission complete.
Mission 4: Cavern
You need to get 240 points to beat this level. You get points for doing things like stealth kills, regular kills, and more. The best thing to do is to travel together and get double stealth kills, which will give you more points. If you do not meet the required number of points, you fail the mission. Just get the number of points in the amount of time and you are done.
Mission complete.
Mission 5: Fortress Of Evil A
This mission is like a big battle royale. You need to make your way through the level and just kill everyone in your path. The point is to kill everyone. Do not leave one enemy behind. You and your friend need to travel together though because the enemies will gang up on you in groups and double team you. Just make your way to the end of the level and you win.
Mission complete.
Mission 6: Fortress Of Evil B
This mission is pretty tough. It takes place in one huge room and you have to fight bosses from all of the levels. You have to fight 2 at a time. I suggest for you to have one character lead a boss to one side of the room and the other player lead the other one to the other side. This will be a lot easier for you in my opinion. After you beat each round, you are done.
Mission complete.
Co-Op Tips
I am now going to list some tips for co-op.
Talk
You guys are sitting right next to each other. You need to talk your way through levels. You need to discuss things before you do something. If one person does not agree on doing something just yet, you probably shouldn’t do it. Just take your time and discuss things. If one person needs help with something, go and help them.
Dual Stealth Kills
A dual stealth kill is given when both characters stealth kill the same guy. To do this, have one person go and press Square for the stealth kill and have the other player be within 10 feet of them. I think you should try to do this as often as possible because it gives you lots of points and it looks cool.
Help
You should always watch your friend’s screen. When it seems as if he might get into some combat and need help because people are ganging up on him, you should go and help him. This will decrease their chance of dying and help your chances of winning the mission.
Roles
You should always know your role in a mission. One person needs to do something and the other needs to do something else. I don’t think you should always try to walk together in missions because it is much easier if you aren’t together.
Well, I hope those tips helped you. Have fun!
Versus Tips
Mission 1: Village
In this level, you have to fight computer enemies to get to the other player. When you get to them, just fight them. The level is the first part of the Ronin Village and there are enemies scattered all over the place.
I suggest getting on a rooftop and watching out for the other player. Try not to kill the computer enemies if you don’t have to and let them take life off of your friend. After that, just fight your friend to the best of your ability and you will most likely win this battle.
Mission complete.
Mission 2: Battleground
This level is more complicated than the last. Stay on roofs and try to avoid all enemies if you can. Just try to make your way to the other player. If you have to fight others, just try to do combos and or stealth kills. After you kill your friend, you win.
Mission complete.
Mission 3: Castle
This level is like a big maze. I suggest killing all enemies that you come into contact with so you will know where you have already been before. Just make your way through the level until you find your friend and kill him.
Mission complete.
Mission 4: Caverns
There are no computer enemies in this level. The cavern is like a cave at the bottom and an upper level at the top that has lots of planks laid out everywhere. If you are battling on one level, go to the other level to escape if you need to. After you kill your friend, you win. This level is much easier than the others due to there being no computer enemies.
Mission complete.
Mission 5: Fortress Of Evil A
There are lots of risen platforms in this level. You need to just come in contact with the other player and kill him to win. There are no computer enemies in this level.
Mission complete.
Mission 6: Fortress Of Evil B
This is just one big level. There are absolutely no enemies here so you are in for a head to head fight between each other. Just do your best to kill the other player and you will eventually win this level. This is also the last Versus map.
Mission complete.
Versus Tips
I am just going to list some tips on killing your friend, well, enemy in this section.
Map
You can see your enemy’s location on the map that you can pull up by pressing Select at all times. Right when the mission starts, you can hurry up and pull up the map to get their location. If you have an Exploding Arrow handy then, you can just turn in their direction and fire. This will give you a leg up in the fights.
Health
You should watch your health meter at all times. I suggest to only use health potions when your health is at 30 hit points or below. Because you both have the same amount of health and health potions, health potion use can make a difference in who is going to win the level or not.
Wrath of Heaven
If you have this ability unlocked, I suggest to almost never use it. If you do want to use it, it will instantly kill the other player. Since it leaves you with only one hit point left, you must land it on the first try or the other player can hit you and kill you. Just try to align it correctly and use it with caution. If you aren’t too skilled with using the ability, I suggest not to use it at all throughout the versus games.
Cheating
You should always watch your enemy’s screen. This will give you a sense of where they are and how they are playing the game. Sure it is cheating, but if you want to win very badly, this is the way to do it. Cheat at the best of your ability.
Rooftops
Rooftops are always important because you can keep an eye on the map that you are currently playing in. They will also help you stay away from computer enemies. If the other player is on a rooftop, this will also decrease your chances of getting hit by a long range projectile from him. You also have more battle options from the rooftop. For example, if the other player is walking on the ground below you, you could jump behind them and hit them from the behind. This will vastly increase your chances of winning.
Well I hope this helped you. Have fun!
Multiplayer Moves List
This is the moves list for the Versus mode in multiplayer. There are moves listed for every character available. You must kill a character in gameplay to get them available to you in Versus mode.
Rikimaru
Slash- Square 2 Slashes- Square + Square 3 Slashes- Square + Square + Square 360 Slash- L3 360 + Square Upper Slash- Hold R1 + Square Flip Slash- Hold R2+ Away + Square Thrust Attack- Away + Away + Square Jump Attack- X + Square Grab- Hold Circle close to opponent Stab Fallen Opponent- Hold R2 + Square Shoulder Thrust- Square + Square + Away + Square Ninjitsu Block- Circle the exact moment the enemy attacks Ninja Vision- Hold L1 + R3 Grappling Hook- L3 360 + Square + Triangle Cling To Ceiling- R1 while grappling Feign Death- L3 360 + R1 Wall Kick- Double Jump towards a wall + Square Ninja Mind Control- Hold R2 + Forward + Away + Square Wrath Of Heaven- X + Circle Heel Kick Combo- Square + Square + Square + Away+ Square Leg Sweep- Square + Away + Square Grappling Combo- Square + Square + Square + L3 360 + Square + Triangle 360 Slash Combo- Square + Square + Square + L3 360 + Square + Triangle
Ayame
Slash- Square 2 Slashes- Square + Square 3 Slashes- Square + Square + Square 4 Slashes- Square + Square + Square + Square 5 Slashes- Square + Square + Square + Square + Square Upper Slash- Hold R1 + Square Flip Slash- Hold R2 + Away + Square 360 Kick- L3 360 + Square Thrust Attack- Away + Away + Square Jump Attack- X + Square Grab- Hold Circle when close to opponent Stab Fallen Opponent- Square when close to them Somersault Kick- Square + Square + Square + Square + Away + Square Ninjitsu Block- Circle when the enemy goes to attack Ninja Vision- Hold L1 + R3 Grappling Hook Combo- L3 360 + Square + Triangle Cling To Ceiling- R1 + Grapple Feign Death- L3 360 + R1 Wall Kick- Double Jump towards wall + Square Ninja Mind Control- Hold R2 + Forward + Away + Square Wrath Of Heaven- X + Circle Heel Kick Combo- Square + Square + Square + Away + Square 5 Slash Grappling Combo- Square (5 times) + L3 360 + Square + Triangle 360 Kick Combo- Square + Square + Square + Square + L3 360 + Square
Tesshu
Punch- Square 2 Punches- Square Upper Pummel- Hold R1 + Square Kick- Hold R2 + Away + Square Thrust Attack- Away + Away + Square Jump Attack- X + Square Grab- Circle when close to opponent Power Punch- Square + Square + hold Square Upper Straight- L3 360 + Square Power Block- Square the exact moment the enemy attacks Cling To Ceiling- R1 + Grapple Feign Death- L3 360 + R1 Enrage- X + Circle Upper Straight Combo- Square + Square+ L3 360 + Square Punch Kick Combo- Square + Square + Away + Square
Tajima
Slash- Square Thrust Attack- Away + Away + Square Jump Attack- X + Square Gun Fire- L3 360 + Square «Fly Baby»- X + Circle Grab & Blast- Circle 6 Shot Combo- L3 360 + Square (6 times)
Nasu
Slash- Square 2 Slashes- Square + Square 3 Slashes- Square + Square + Square 360 Slash- L3 360 + Square High Low Slash- Hold R2 + Away + Square Thrust Attack- Away + Away + Square Jump Attack- X + Square Grab- Hold Circle close to opponent Spare Me Trick- X + Circle + Square 3 Slash 360 Combo- Square + Square + Square + L3 360 + Square
Hamada
Slash- Square 2 Slashes- Square + Square 3 Slashes- Square + Square + Square 360 Slash- L3 360 + Square Thrust Attack- Away + Away + Square Jump Attack- X + Square Grab- Hold Circle when close to opponent Charge Strike- X + Circle Bow And Arrow- Hold R2 + Away + Square + Square + Square 3 Slash 360 Combo- Square + Square + Square + L3 360 + Square 3 Slash Arrow Combo- Square (3 times) + Away + Square (3 times)
Jonin Red
Slash- Square 2 Slashes- Square + Square 3 Slashes- Square + Square + Square 360 Slash- L3 360 + Square Upper Slash- Hold R1 + Square Thrust Attack- Away + Away + Square Jump Attack- X + Square Grab- Hold Circle close to opponent Throat Slash- X + Circle 3 Slash 360 Combo- Square + Square + Square + L3 360 + Square
Jonin Blue
Slash- Square 2 Slashes- Square + Square 3 Slashes- Square + Square + Square Upper Slash- Hold R1 + Square Thrust Attack- Away + Away + Square Jump Attack- X + Square Grab- Hold Circle close to opponent Kamikaze- X + Circle
Chibot
Slash- Square 2 Slashes- Square + Square 3 Slashes- Square + Square + Square Thrust Attack- Away + Away + Square Grab- Hold Circle when close to opponent Cyclone Slash- 360 + Square Fly- Hold X Gun Fire- Hold R2 + Away + Square Gun Fire Air- X + Square Bomb Drop- X + Circle
Kunoichi
Slash- Square 2 Slashes- Square + Square 3 Slashes- Square + Square + Square Upper Slash- Hold R1 + Square Thrust Attack- Hold R2+ up + X + square Jump Attack- X + Square Grab- Hold Circle when close to opponent Back Flip Kick- Square + Square + Away + Square
Kagura
Slash- Square 2 Slashes- Square + Square Upper Slash- Hold R1 + Square Thrust Attack- Away + Away+ Square Jump Attack- X + Square Paralyzing Charms- 360 Square Pentagram Charm- Left + Right + Square Taunt- X + Circle Teleport- X + L3 Upper Slash Combo- Hold R1 + Square + Release R1 + Square + Square
Kempo Bouzu
Punch- Square 2 Punches- Square + Square 2 Punches And A Sweep- Square + Square + Square Kicks- Hold R2+ Away + Square + Square Uppercut- Hold R1+ Square Thrust Attack- Away + Away + Square Jump Attack- X + Square Grab- Hold Circle when close to opponent Energy Ball- X + Circle Hurricane Kick- L3 360 + Square Punch Kick Combo- Square + Square + Hold R2 + Away + Square + Square
Semimaru
Slash- Square 2 Slashes- Square + Square 3 Slashes- Square + Square + Square 360 Slash- L3 360 + Square Upper Slash- Hold R1 + Square Flip Slash- Hold R2 + Away + Square Thrust Attack- Away + Away + Square Jump Attack- X + Square Grab- Hold Circle when close to opponent Heel Kick Combo- Square + Square + Square + Away+ Square Leg Sweep- Square + Away + Square
Jinnai
Slash- Square 2 Slashes- Square + Square Thrust Attack- Away + Away + Square Jump Attack- X + Circle Grab- Hold Circle when close to opponent Ground Cutter- Hold R2 + Away + Square Counter Strike- X + Circle
Onikage
Kick- Square 2 Kicks- Square + Square 3 Kicks- Square + Square + Square Round House- Hold R2 + L3 360 + Square Crouch Kick- Hold R1 + Square Jump Kick- X + Circle Grab- Hold Circle when close to opponent Flying Scissors Kick- Away + Away + Square Grabbing Flash Kick- X + Circle Hand Through Gut- Hold R2+ L3 360 + Circle Kicks Roundhouses- Square (x2) + Hold R2 + Away + Square (x2) 1 Kick 3 And Roundhouses- Forward + Square + L3 360 + Square (x3) Kick And Roundhouses- Forward + Square (x2) + L3 360+ Square (x3) Roundhouse Kicks- Hold R2 + L3 360 + Square + Square + Square Side Kick And Roundhouse Kicks- Hold R2 + Away + Square (x4) Flying Scissors Kick- Square (x 3) + L3 360 + Square (x2) + Away (x2)
Ninja Dog
Slash- Square 2 Slashes- Square + Square 3 Slashes- Square + Square + Square 4 Slashes- Square + Square + Square + Square 5 Slashes- Square + Square + Square + Square + Square Upper Slash- Hold R1 + Square Flip Slash- Hold R2 + Away + Square 360 Kick- L3 360 + Square Thrust Attack- Away + Away + Square Jump Attack- X + Square Grab- Hold Circle when close to opponent 360 Kick Combo- Square + Square + Square + L3 360 + Square Heel Kick Combo- Square + Square + Square + Away + Square
Tatsumaru
Punch- Square 2 Punches- Square + Square Jump Attack- X + Circle Thrust Attack- hold R2 + Forward + X + square Grab- Hold Circle when close to opponent Ultimate Combo- Hold R2 + Away + Square 2 Punch + Kick- Square + Square + Square 6 Hit Combo- Square + Square + Square + Square + Square + Square Thrust Attack Combo- Hold R2 + Forward + X + Square Thrust & Jump Combo- Square (x4)+R2 +Forward +X +Square +X +Square
Mr. D- CEO
Slash- Square 2 Slashes- Square + Square Thrust Attack- Away + Away + Square Crouch Slash- Hold R1 + Square Jump Attack- X + Circle Grab- Hold Circle when close to opponent Electrocution Slash- Hold R2 + L3 360 + Square Energy Ball- X + Circle
That’s all so I hope that helped you. Thanks to John for some help on this section.
Codes
I might not have them all, so check GameFAQs.com and Tenchu.de for more of the codes.
Enable All Stages And Missions In Multiplayer
At multiplayer select stage/mission in versus or co-op and use the same code as for Unlock All Missions in the main story mode: Press L1, R1, L2, R2, Right, Square, L3, R3
Increase Items
At the Item Selection Screen hold R2 + L2 while pressing: Square, Square, Square, Up, Left, Down, Right.
Restore Health
Pause the game and then press: Up, down, Right, Left, Square, Square, Square.
Turn Special Abilities On And Off
Pause the mission (by pressing START). Hold down L1 and L2 and press Up, Up, Down, Down. Release L1 and L2 and press Square, Square, R1, R2.
Unlimited Item Capacity
At the item selection screen. Hold down L1, L2, R1, R2 and press Square, Square, Square, Up, Left, Down, Right, Down, Up, Right, Down, Left. You are still restricted to carrying 6 different items, but you can choose any amount of them you want to.
Show Score
Pause the mission (by pressing START). Now use the controller plugged in to your 2nd port and press Right, Right, Left, Left. While you play you can watch your score and time.
Increase Score
Pause the mission (by pressing START). Now use the controller plugged in to your 2nd port. Hold down L1 and R1 and press Right, Right, Left, Left. 100 points will be added to your score.
Unlock all Characters
At the Title Screen press: L1, R2, L2, R1, Right, Left, L3, R3. Note: L3 + R3 means press the analog sticks.
Unlock All Items
At the Item Selection screen hold R1 + L1 while pressing: Up, Square (x2), Left, Square (x2), Down, Square (x2), Right, Square (x2).
Unlock All Layouts
At the Mission Selection Screen press: R3, L3, R2, L2, R1, L1. Note: R3 + L3 means press down on the analog sticks.
Unlock All Missions
At the Mission Selection Screen press: L1, R1, L2, R2, Right, Square, L3, R3. Note: L3 + R3 means press the analog sticks.
Unlock Bonus Stage
At the Title Screen press: L1, Up, R1, Down, L2, Right, R2, Left.
Unlock Demo Level
At the Start Screen, press Up, Down, Right, Left, X, X, X.
Unlock B-Side With Code
At the start screen (red one with Tenchu logo) hold L1 + R2 and press: Down, Square, Up, Square, Right, Square, Left, Square. Now go to «Options - Audio - Language» . If you own the North American or UK release you can now select a 3rd voice over option called «B-Side». The «B-Side» is not unlockable in the French, German, Italian and Spanish release of Tenchu: Wrath of Heaven. Read the Endings And B-Side section for more details on B-Side.
Secrets
Unlock Bonus Stage
You have to beat the game with all three characters to unlock Through The Portal for Rikimaru.
Unlock B-Side Language
Get Grand Master ratings on layout 1 for all characters. You will then find the option in the sound options. To read more on what B-Side is, read the Endings And B-Side section, but beware for it contains spoilers about the game’s endings for each character. Make sure you read the right section to avoid reading spoilers.
Unlock Tesshu
Just beat the game with both Ayame and Rikimaru to unlock Tesshu.
Stone of Power
This item is a secret item that can only be obtained by finding it. It is on the Amagai Caslte level and is hidden on the floor beyond Dr. Kimaira. It is in the same place for both Rikimaru and Ayame. Check the Frequently Asked Questions section for further details on the Stone of Power.
Dokuto
Dokuto is Ayame’s second pair of swords. They are hidden in the Buddha Temple level in the same place as Rikimaru’s sword. Check the Frequently Asked Questions section for further details on the sword.
Fugaku
Fugaku is Rikimaru’s second sword. It is hidden in the Buddha Temple level in the same place as Ayame’s swords. Check the Frequently Asked Questions section for further details on the sword.
Semimaru
Semimaru is Rikimaru’s faithful dog. You can unlock him in Versus mode by getting a Grand Master ranking on every level for Rikimaru. This only has to be done on one layout.
Ninja Dog
Ninja Dog is Ayame’s faithful dog. You can unlock him in Versus mode by getting a Grand Master ranking on every level for Ayame. This only has to be done on one layout.
Rikimaru’s Second Ending
Rikimaru has two endings. Depending on the option that you choose in the Cemetery level, you will get a certain ending. To see a different ending than the first you saw, simply play level 6 again and select the other option that you didn’t choose the first time. Then go play the last level again and beat it to see the second ending. To read more on this, check out the Ending And B-Side section, but beware for it contains lots and lots of spoilers that explain the endings.
Ayame’s Second Ending
Ayame has two endings. Depending on the option that you choose in the Amagai Castle level, you will get a certain ending. To see a different ending than the first you saw, simply play level 6 again and select the other option that you didn’t choose the first time. Then go play the last level again and beat it to see the second ending. To read more on this, check out the Ending And B-Side section, but beware for it contains lots and lots of spoilers that explain the endings.
Endings And B-Side
Thanks to BNii for this whole section that he let me use out of his FAQ/Walkthrough on the game. You can check it out at GameFAQs.com among other sites.
This section will give you both of the alternate endings for Rikimaru and Ayame and it will explain the B-Side dialogue. The alternate endings are obtained by doing one of the two options on the Cemetery level for either character.
Both Rikimaru and Ayame have two possible endings, and a variation of cut scenes involving the boss for their ninth mission (Onikage of Rikimaru and Tatsumaru for Ayame). The branching point for the endings occurs in Rikimaru’s sixth mission (Cemetery) and Ayame’s sixth mission (Amagai Castle). These are spoilers so consider yourself warned.
Rikimaru Ending 1 - Use the Shichishito sword to repair Izayoi.
Rikimaru asks Ressai to use the Shichishito sword to repair Izayoi. Ressai asks if he’s certain, as although the steel in the Shichishito sword is as strong as the steel in Izayoi, combining the two could have unexpected results. Rikimaru asks him to do his best, then retrieves the additional steel for Ressai to repair the Izayoi.
When Rikimaru confronts Onikage at Tenrai’s fortress, he is suddenly struck by mysterious energy emanating from the sword. Onikage tells him that he’s fallen for his trap. He intentionally plotted to let Rikimaru retrieve the Shichishito sword and repair Izayoi with it. Now that the Shichishito’s power is running through the sword, nothing can stop Mei-Oh’s return. Despite the evil energy in Izayoi, Rikimaru still manages to defeat Onikage.
Rikimaru confronts Tenrai and begins to do battle with him. Tenrai calls forth the power of Mei-Oh and it seems that Rikimaru is powerless against him. Tatsumaru’s voice calls to Rikimaru to use the power of Doujutsu and focus on his right eye. With renewed strength Rikimaru fight back. But the power of the Shichishito in Izayoi is overwhelming, sending the sword flying through the air. Ayame tries to give the sword back to Rikimaru, but the sword is too powerful for her to handle. Against all odds Rikimaru grabs Izayoi and manages to defeat Tenrai.
Lord Godha and Sekiya arrive to see Tenrai standing. Sekiya panics but Tenrai ends up falling over dead, with Rikimaru victorious behind him. Gohda comments on how lucky they are to have the Azuma ninja on their side.
Rikimaru Ending 2 - Don’t use any new steel.
Rikimaru tells Ressai to do his best to repair Izayoi with the steel he has on hand. Later at Tenrai’s fortress Rikimaru fights Onikage in a climactic battle. Rikimaru then confronts Tenrai and begins to do battle with him. Tenrai calls forth the power of Mei-Oh and it seems that Rikimaru is powerless against him. Tatsumaru’s voice calls to Rikimaru to use the power of Doujutsu and focus on his right eye. With renewed strength Rikimaru fights back. Tenrai is defeated, but in a last ditch effort he leaps up to kill the exhausted Rikimaru. Rikimaru drives Izayoi through himself, impaling both himself and Tenrai.
Lord Godha and Sekiya arrive to see Tenrai standing. Sekiya panics but Tenrai splits in half, with Rikimaru victorious behind him. Gohda comments on how lucky they are to have the Azuma ninja on their side.
Ayame Ending 1 - Let Rikimaru fight Onikage.
Ayame lets Rikimaru fight Onikage while she hurries off to the Buddha temple. At Tenrai’s fortress Ayame fights Tatsumaru in a decisive battle. Ayame wins but spares his life, telling him that there’s much she has to tell him. She runs off to confront Tenrai. Ayame fights Tenrai, who uses the Jewels of Heaven and Earth to transform into a monstrous form. Ayame seems powerless to resist, but the sister’s bells given to her by Princess Kiku begin to resonate. The light from the bells cancels out Tenrai’s power, and Ayame takes advantage of this and defeats Tenrai. Tenrai can’t believe that he lost, and in a last ditch effort to destroy Ayame sacrifices himself to free Mei-Oh from his prison. At this time Rikimaru and Tetsumaru show up. Tetsumaru has a box filled with explosives (?) and tells the others to get out of fortress while he destroys the portal for good. The two Azuma ninja leave and Tatsumaru says that while he has strayed from his teachings, he’ll make up for it by destroying Mei-Oh. He tells Kagami to wait for him (a reference to Tenchu 2’s story line) as he blows himself and the portal up.
After the destruction of Tenrai’s fortress Ayame broods on the events that have recently taken place back at the Azuma ninja village. As she looks at the bells Kiku gave her, she hears Kiku calling her name. Kiku arrives followed by a slightly winded Godha and Sekiya.
Ayame Ending 2 - Fight Onikage yourself.
Ayame decides to fight Onikage herself while Rikimaru reports back to Godha. She manages to defeat Onikage, but despite dealing a seemingly fatal blow Onikage disappears yet once again. Later at Tenrai’s fortress Ayame meets Tatsumaru again and defeats him in an epic battle. Out of nowhere Onikage appears to attack Ayame, but before he can strike her Tatsumaru stabs and grabs him. He then proceeds to step off the platform edge, taking both of them to their doom.
Ayame fights Tenrai, who uses the Jewels of Heaven and Earth to transform into a monstrous form. Ayame seems powerless to resist, but the sister’s bells given to her by Princess Kiku begin to resonate. The light from the bells cancels out Tenrai’s power, and Ayame takes advantage of this and defeats Tenrai. Exiting the fortress, Onikage suddenly appears and attacks Ayame, but is stabbed by Rikimaru. Onikage dissolves into nothingness while a nonplussed Ayame ignores Rikimaru’s outstretched hand to help her up and the two of them leave the fortess. Gohda comments on how lucky they are to have the Azuma ninja on their side.
B-Side Story
The B-Side dialog track can be unlocked by earning a Grand Master ranking for the first layouts of all of Rikimaru’s and Ayame’s missions. You do not have to get a Master of Assassins ranking for all of Tesshu’s layouts. You can select the dialog track in the sound option in the options menu. The B-Side track is basically a humorous outtake on the normally serious dialog of Tenchu: Wrath of Heaven. Note that the subtitles will not match the new dialog so you will have to listen carefully. Onikage’s rant in the Limestone Cavern is hilarious.
Just a little note, but if you want to see both endings for Rikimaru or Ayame, just go replay the Cemetery level and pick the option that you didn’t choose the first time. Then, beat the Cemetery level and last level again.
Frequently Asked Questions
Q = Question
A = Answer
Q: Is there a debug code in the game?
A: The debug code is supposed to be a series of codes this time around instead of one long code. There are a few parts of it released already and I will add the rest of them in this FAQ as they are released. Until then, you could always check up on http://tenchu.de for the latest Tenchu news and they will have the codes first.
Q: What is the score needed for the Grand Master rating?
A: You need at least 450 points.
Q: Can I still sheathe my sword and drag bodies?
A: No you cannot do either.
Q: Is there a level editor?
A: Nope.
Q: Can I play as Tatsamaru?
A: Not at the moment, but after the rest of the Debug codes get released, there could be a chance at them letting you.
Q: On the Cemetery level with Rikimaru, I have a choice to do one of two things to the sword. What happens if I pick the wrong one?
A: There is no right or wrong choice. The only thing that this affects is two cut-scenes towards the end of the game.
Q: Should I get this game?
A: Yeah.
Q: For a ninja, why is Tesshu so big and slow?
A: Well, he isn’t a ninja. He is just an assassin for hire.
Q: How do I unlock the secret level, Through The Portal?
A: You must beat the game with Rikimaru, Ayame, and Tesshu.
Q: How do I unlock the B-Side dialogue and what does it do?
A: You have to Grand Master every level on the first layout for Ayame, Rikimaru, and Tesshu. It is basically a different dialogue in the game and a new plot. The new storyline is geared toward laughter and not seriousness unlike the real story.
Q: Where is the Stone of Power for Rikimaru and Ayame?
A: It is in the Amagia Castle level for both of them. Towards the end of the level where you have to go outside for a bit, there is a secret door that you have to lean on to make it open right past the wooden bridge. It is in that room.
Q: Where are Rikimaru and Ayame’s third weapons?
A: It is in the Buddha Temple level. Remember that pit towards the end of it that was mostly gaps and you had to jump on the small planks of wood? Well look in the pit until you find a platform. This platform is like a little bridge. Jump down onto it and look for it down there.
Tenchu Shadow Assassins (PSP) - Walkthrough
Nota
Para mais guias legais como esse você só encontra em: https://gamefaqs.gamespot.com
Tenchu: Shadow Assassins permite que os jogadores dominem as técnicas mortais de um ninja real no sistema PSP. Uma nova saga de Rikimaru e Ayame, ninjas de elite que devem usar suas habilidades letais para manter a paz no Japão feudal.
I. INTRODUCTION
Tenchu: Shadow Assassins is the latest in the Tenchu series of games focusing on stealth and cunning instead of just running in guns (or swords, in this case) blazing. The developers have changed things up by making the camera behind the back a la Resident Evil 4 and 5, and it makes the game play considerably differently from previous entries in the series.
The PSP version has half the stages of the Wii (the Wii has Shadow versions of each stage), but with the ability to play it portably, this is an ok loss, the fact that they werea ble to squeeze everything into the UMD is nothing less than a miracle.
II. CONTROLS
L - Run
You can run, but it’ll alert enemies easily.
R - Hayate
Hayate allows you to move between shadowed areas without being spotted by enemies. You’ll be relying on this a lot.
Triangle - Ninja Vision
Shows you enemy field of vision and hiding areas. You’ll be using this a lot too to gauge where enemies are.
Square - Stealth Kill (Hissatsu)
When an enemy is near you and is not in alert mode, you can use the square button to stealth kill him. However if he is in alert mode (searching for you) he’ll be untouchable until he gives up.
X - Jump
Self explanatory.
O - Action
Used to do special actions such as climb onto rafters.
Directional buttons - Item usage
Left and right pick your items, up drops your current item, and down uses the item (you’ll go into aiming mode for this, use the O button to use the item).
Analog Stick - Movement
Again, self explanatory.
III. STORY MODE
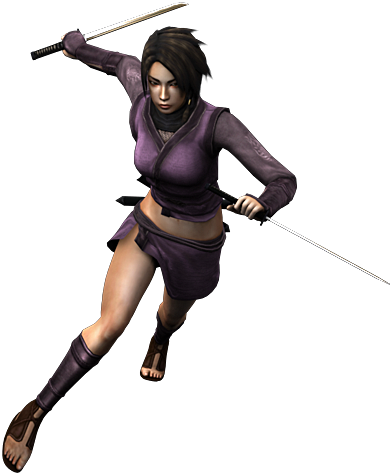
STAGE 1 - THE EVIL MERCHANT
Run forward and kill the guard. Go through the door to your right. Kill the guard ahead of you and stick to the wall’s shadows until you can get to the next guard and kill him as well. Go through the gates.
Hide in the thickets to your left and blow out the candle. Use the new shadows to get to the next pile of thickets where you can hide. Keep going and pick up the box, put it next to the wall, jump on it, and climb the wall. Keep following the path (you can kill the enemies from inside the gate to get hissatsu scores). Along the path, you’ll find a bamboo tube. Get it, and fill it with water in the nearby pot. Use it to put out the torch. Go through the bushes so you can kill the guard. Go through the nearby door, and jump onto the rafters on your left. Be careful while navigating these rafters, because you can easily fall off. When you get above the guard, hissatsu kill him. Now jump down and go through the door.
Kill the guard nearest to you, then hide in the thickets. Go to the right of where you began and jump into the water. Your bamboo tube will keep you silent in the water. You can go right until you can stealth kill the guard standing near the bridge. Now swim to the other side right in front of the goal and get out of the water. Turn around and stealth kill the guard on the bridge. Then go back towards the goal and turn left, keep followign this path until you see a guard with his back towards you. Stealth kill him and grab the nearby rock. Now go to the goal and enter.
Go forward and pick up the shuriken. Use it to kill the guard by the well. Beside the well there will be a sword. Drop your rocks and take the sword, then use it to break the lock on the nearby door. Enter and take the shuriken directly in front of you. Turn left and you’ll see a candle. Use a shuriken to blow it out. Walk forward while staying in the shadows, then turn right into the doorway. Now, go through the door to the right, and then the other open door. You can then stealth kill all three enemies here. Now go to the goal but don’t enter yet. Turn left and kill the guard there by going through the shadows. Now go to the goal.
Turn right, jump and climb onto the shelf, then walk forward and kill the guard. Jump down, then go through the door. Pick up the nearby sword, and hide in the thickets. Walk forward and kill the guard. Now go left and through the door nearby and kill the guard here, too. Now go to the house opposite the one you are in now. As you enter, go to the right. Circle around to the guard and stealth kill him. Now go through the goal door.
Hide in the bushes and inch forward. Kill the guard, and go through the door. Go to the right and jump up onto the rafters. From the rafters you are able to stealth kill every enemy, including the Merchant, easily without being seen.
STAGE 2 - THE BANDIT RINGLEADER
Hide in the bushes and when the guard turns his back, stealth kill him. Now jump down to get a bamboo tube. Go up to the other side and stealth kill the guard there. You’ll find a sword inside a nearby door. Go down the path and stealth kill a guard there. Now go through the goal.
Put out the torch with your bamboo tube, and go right to the well. Get the bamboo tube there and turn left. Hide in the thickets when the guard can’t see you, then while he has his back turned, come out and kill him. Go to the watchtower from the shadows so you won’t get spotted. Behind the tower is the goal.
Go forward and you’ll find a guard. When he turns around, kill him from behind. Keep to the shadows and fo to the right, then through the nearby door. Go forward while staying to the right, and you’ll eventually find a guard. When he turns around, kill him. Now exit the room and kill the guard who ahs his back turned. Take the shuriken and then hide in the thickets. Kill the patrol when he’s turned away. Walk forward, then left, and kill the guard there, as far away from the gate as you can. Hide behind the gate and a guard will come through. Kill him and go through the gate. Kill the guard to your left and go through the goal.
Take the fishing rod and to the left is a key. Use the fishing rod to grab they key and unlock the gate. Now hide in the thickets and when a guard gets near kill him. Go to the water and jump in. Go to the other side, and walk around the guard and kill him. Now go through the goal.
Go right so you can kill the guard as he nears you. Now go to the guard who has his back turned and kill him and take the key nearby. It can be used to unlock the exit.
Hide in the shadows and then behind the pillar, and kill the nearby guard when he has his back turned. Now take a box and go to the other pillar and jump onto the higher ledge. When the guard is under you, kill him. Now climb up and go left, then jump over the hole. There is a guard here that you can kill. Once you do, go above the ringleader and stealth kill him.
STAGE 3 - DAIMYO TADO
Go forward and hide in the jar. When the guard walks nearby stealth kill him. Now go right and you’ll see a guard doing rounds. Wait until he turns his back and can’t see you, then jump into the makeshift closet there and kill him when he gets close. You’ll find a torch nearby with a rock behind it. Jump into the pot nearby and kill the guard when he is near. Now go forward and you’ll see another jar that you can use to stealth kill another guard. Go to the end of the path and stealth kill the guard when his back is turned. Keep moving on and you’ll find another guard patrolling the area. Wait for him to turn, then kill him. Use a rock to take out the guard patrolling above you. Now go through the gate.
Jump on the crate, then jump over the fence and hide in the hole to the left. Come out when the guard is nearby and he has his back turned towards you and kill him. Now go to your left and hide in the closet and kill the guard when he is near. Another guard will be patrolling this area. While he has his back turned towards you, come out of the hiding place and stealth kill him. Follow the path he was patrolling on and you can kill the two guards further on easily. Go to the goal.
Go forward and kill the sleeping guard. Continue on and you’ll see a guard walking beyond two holes in the ground. Hit him with a rock when he’s near a pit to kill him. From here use a sword to break the lock nearby. Inside, kill the guard when he turns his back to you and to your left when you go out you’ll see a guard. Kill him. You can now go through the goal.
Go forward and jump into the pot. When the guard gets near, kill him. Now go left and up the stairs, picking up the smoke bombs on the way, and throw a smoke bomb at the nearest guard. Run in and kill them all. Go out the nearby door and jump up onto the rafters so you can kill the guard when he comes by. Now jump down and go to the goal.
Hide in the thickets and then throw a rock at the gunner. Keep moving between the bushes and kill the guard nearby. Another guard will be walking ahead, kill him when his back is turned. Now go into the tunnel and you’ll be faced with two guards. You’ll have to kill one, then the other quickly when they have their backs turned. Now keep going to the goal.
Take the poison at the left. Now hide at the right so you don’t get spotted. When the servant comes out and goes to the Daimyo, run into the small room she was in and posion the water inside. Now jump onto the rafters and wait for the Daimyo to be poisoned.
You’ll have to fight a female ninja in a swordfight now, it’s fairly straightforward.
STAGE 4 - GODA CASTLE
Go left and hide in the shadows, and make your way into the thickets. Kill the guard, and take the nearby shuriken. Use the shuriken to kill the ninja hiding to the left of the gate, and then go to the guard and kill him, then walk to the guard just standing there and kill him. Now take the kasugai to the left and use it to go to the goal.
Extinguish the nearby torch and go through the shadows on your left. Now you’ll see two guards, one standing, one walking. When the walking one won’t notice, Throw a shuriken at the gunner, and it’ll kill both him and the standing guard. Now go behind the walking guard and kill him as well. Keep going and you’ll find a wagon and nearby is a balcony. Crawl under the balcony to the thickets and use it to sneak past the two guards, then jump out and kill them. Go to the goal.
Extinguish the flame, and then hide in the shadows and go forward. Now kill the walking guard and keep going forward and extinguishing the candles. Eventually you’ll find a guard around the corner. Wait for him to turn around and kill him. Jump into the water and swim under the bridge and the to the left. Kill the guard by going out of the water when the guard turns his back. Go to the guard watching the bridge and kill him from behind. Now going into the building and you will see a guard that will continually turn. When he can’t notice you, run in and kill him. Then go to the goal.
Turn to the left and use a shuriken to kill the guard in the thickets. There’s now another guard walking on the path. Kill him when he’s turned around and go to the shadows to the right. You’ll find an open door and a box nearby. Use it to jump onto the roof and down the other side. Kill the guard in the room nearby and go back out and go up to where the fireworks are. Hide along the wall and kill the two guards then go to the goal.
Go to the right, up the stairs, and then up onto the rafters. Walk to a guard and kill him, and jump down. Go through the nearby door and kill the guard that’s sitting down, then kill the sleeping guard. Near the sleeping guard there is a Ninjato. Take the box and go back to the start of the section and use the box to get up to the rafters. Follow the rafters and stealth kill the guard, then drop down and you’ll eventually come upon a guard that turns every so often. When he turns away, kill him and go up the stairs.
Walk while hanging left and turn right, then hide in the shadows. Turn right and go hrough the nearby door. There will be a kasugai here, use it to go under the mattress when the guard leaves. Kill him when he comes back. Now go back to the beginning and use a shuriken to kill the ninja outside the window. Now move on, and you’ll find a guard doing rounds. Kill him, and go through the nearby door. Kill the guard nearby who is looking away. Now go up the stairs to the goal.
Climb up the rafters and kill the guard as you move forward. Now drop down and when you have a chance, run in the door and hide under the table. Kill the patrol, then the sitting guard, and then jump onto the crates. Now go upstairs and go forward, hiding in the shadows. There’s a guard hidden here, use a shuriken to kill him. Move to the window and you’ll see a guard below. Jump into the shadows below and extinguish the light, then kill the guard when he is near. Continue on and kill the guard when he looks away, then pick up the key. Now, go to where you killed the guard who was sitting down. There is a door nearby locked, use the key to unlock it. Now go to the exit. You’ll have to fight Ayame in a sword duel now.
STAGE 5 - AYAME
Go right and jump onto the tree branch. Jump to the next tree, then drop down to the right to grab the kasugai. Now go back onto the tree amd jump to the next tree, then drop to the ground. Keep going and get onto the ledge to the left and kill the guard. Now go back and go left so you can use the kasugai you got to climb the stone barrier. Keep going and kill the guard as you drop down. Now go right in the shadows and kill another guard, then turn left and go to the cliff. Jump onto the platform, and then onto the tree. Jump forward through the trees then jump down. Hang onto the cliff and kill the samurai, and go to the goal.
Grab the Ninjato to the right. Cross the bridge, then jump onto the trees to cross the hole. Go up onto the ledge and turn right. Jump over the broken bridge, go left, jump down, and then use the trees to go over the hole. Go back down to the ground and jump over the hole. Keep pressing on and jump over the hole on your left, Stealth kill the guard and then go up and hide in the thickets. Kill the walking guard first then the standing guard. Now go jump onto the crate nearby and hang onto the ledge and kill the guard, then drop down and kill the other guard when his back is turned. You’ll eventually see another broken bridge. Jump over it and go to the goal.
Keep moving between thickets and go under the wagon until you get to the bridge, then drop off and kill the guards there. Now hide in the thickets nearby and keep moving along them, and kill the guard. Now get to the next bush ASAP and kill the guard when he gets near to you. Go to the goal now.
Go to the right in the shadows and kill the walking guard when he doesn’t notice you. Now go back into the shadows until you reach the building corner and kill the guard when he has his back turned. Now go back to where you started and kill the gunner with a shuriken. There will also be a guard near a well. Kill him with a shuriken and also a ninja in the sadows near the wall. Now go in the house and get the key and more shuriken, and go unlock the door near the tower, and go through the goal.
Go through the door, and go to your right. There are two guards here. When the walking guard won’t notice, run out and kill the standing one and then quickly kill the walking one. Now go left and there will be a lone guard which you should easily be able to take down. Down go into the house on your right and you’ll find a key. Now keep going on the path and go into the door on the right. Unlock the door and kill the guard, then go through the goal.
A ninja guard is running around near a nearby house. Go to where he is (you can see the ninja during his rounds) and kill him when he is near. Blow out the candle and hide in the shadows to avoid the samurai. In the back you are able to jump onto the roof. Give the samurai death from above and then kill the gunner on the tower with a shuriken. Now, go to the balcony outside, then through the thickets and under the wagon to end the level.
STAGE 6 - THE PRINCESS
Grab the kunai nearby and kill the hidden ninja in the thickets beyond the torch. Go into the cave and you’ll find a guard. Wait until he turns his back and then kill him. Continue through the tunnels and you will see rafters. A ninja will be hidden in these raftes a ways off and there will be a guard as well. Jump onto the rafters and kill the guard, then use a kunai to kill the ninja. Continue through the cave until you’re outside again and you’ll find a guard to the left of the exit, as well as a ninja in the thickets. Kill the ninja and then hide in the bushes to kill the guard. Now go to the goal.
You’ll find a cat in front of you. Go to the gate and you’ll find a ninja to your left. Kill him, and go left. There is a ninja under the balcony. Kill him with a kunai and go right. Under the bridge you’ll see another ninja, so kill him as well. Now go through the gate and you’ll find a guard and ninja on a bridge. You’ll want to kill the ninja so that he falls on the samurai. Now go to the corner and use the cat in order to jump over the boxes. Now go into the hole and then the stairs. Kill the guard sleeping here and get the cat, and go to the goal.
You’ll see a guard walking away. Kill him, and continue on. You’ll see a guard to the left. Kill him, and then take the box full of explosives and put it by the blockade at the entrance to the cave. Use a kunai to blow it up and go in the cave. Kill the ninja at the other side of the door in the cave with a kunai, then kill the gunner from behind. Go through the cave and kill another gunner, and eventually you’ll be outside again. Use a cat to get into the house with a hole and kill the guard near the goal from behind. Now go to the goal.
Go to the right and go under the balcony to kill the guard. Then throw a kunai at the ninja at the bridge. Now go forward and to the left is a gaurd. Kill him when his back is turned, and take the cat. Use the cat to go through the wall. Get the Ghostmaker and then use it to blow out the weakened wall. When it’s safe, go out and turn right, killing the ninja with a kunai or shuriken, then keep going and kill the ninja with his back turned. You’ll find an enemy near some explosives, so use the kunai to destroy the explosives and kill him.
STAGE 7 - THE MERCHANT
Go forward and hide in the nearby thickets. Move through the thickets and kill the guard. Wait for the ninja to have his back to you then kill him, too. Now hide in the bushes and kill the guard, and then go onto the roof. Now jump onto the roof of the nearby house made of wood and get the kunai, then jump onto the roof of the next building. You should be able to see the goal from here. There will be three enemies here, a guard near the exit and two to your left. Kill the walking guard closest to you first, then the guard further to your left second, then the standing guard near the exit. Now go through the goal.
Go to the right of the pillar, and kill the ninja on the left. Hide in the shadows and kill the standing ninja, then run behind another walking ninja and stealth kill him (be careful not to be seen by the gunner). Now jump on a nearby box and then upstairs, and kill the walking ninja up here. Now jump over the nearby hole on the ground and kill the walking ninja while he’s walking away. Then use a kunai to kill the gunner. There is a samurai right under a hole, so jump down and kill him. Now go to the goal.
There is a guard towards your left that you can hit with a kunai to make him fall down a well. After you hit him, use another kunai to kill a ninja in a thicket. Now go to the right of the garden and you’ll find a bamboo tube. From here you can see some doors. There is a ninja hiding in the thickets near these doors. Use a kunai to kill him. Now go back to where you began the section and jump into the rafters. Cross over the fire, drop down, and grab the ghostmaker. Kill the walking ninja around the corner from behind. Now climb onto the rafters on the boxes, and kill the walking samurai from above. You’ll see a hole in the wall you can go out of. There’ll be a walking guard outside who you can kill. Now go to the goal.
Grab the kunai in front of you and go forward. Kill the ninja to your right when his back is towards you and use kunai to kill the ninja on both sides. Now drop down and kill the ninja near the goal. When the samurai can’t see you, run and jump over the water, under the bridge, then up some boxes upstairs. Now hide in the thickets and kill the guard. Now go to the goal.
Go forward and jump onto the ledges to kill a walking ninja. Above, there will be another ninja and two guards. Hide in the thickets, then under the balcony to kill the walking guard. Now, from where you started, hide in the shadows and kill the ninja in the corner with a kunai. Keep yourself hidden in the shadows until the walking ninja has his back towards you, then kill him. As you move ahead, there will be a ninja hiding in the shadows. Take care not to happen upon him while you’re moving, and kill him with a kunai. Now go to the goal.
Extinguish the flames, then hide in the shadows. Move through the shadows and kill the nearby guard, and then use a kunai on the gunner in the tower to kill him. Now go to the corner and hide in the shadows to sneak up on a guard and kill him. Now keep going through the path and you’ll find a guard that keeps turning. Kill him when he’s turned away and keep going. Hide under the balcony in order to sneak up on the next guard and kill him, as well. Now go into the house and go to the left when you see a guard. Jump into the rafters and make your way to the merchant. Kill him from above to end the level.
STAGE 8 - THE PRINCESS
Go through the thickets and kill the guard while his back is ruend. Now grab the box he dropped and put it near the wall you can climb and use it to get over. Now you’ll see an open door ahead. There is a guard patrolling the area, so let him pass and run past him into the house. Now jump into the rafters and you’ll see a second guard. Kill both the guards from above the rafters, and then continue onward. You’ll find a walking guard near the goal. Wait until his back is turned, and kill him. Then take the key in the room and open the doors to the goal.
Extinguish the nearby light source, then hide in the shadows to kill a guard. Now go right and kill the guard when he’s turning away from you. Now go back to the beginning and keep extinguishing the lights and moving in the shadows. Eventually you’ll see a servant. Kill her and hide behing the door. There is a guard in the next room, when he turns his back, kill him. Now go to the guard’s path and you’ll eventually find another guard. When he can’t see you, extinguish the lights and hide in the shadows, then kill him when he is near. Head to the goal.
Now, take the kunai to your left. Hide in the shadows and when the guard comes near, kill him. Getting to the door, run out when the guard won’t see you and hide in the thickets, then kill him. Grab the fishing rod and key nearby and unlock the door. When inside the door, jump into the rafters from the shelf on your left. Kill the guard, then throw a kunai at a ninja in the rafters. Now go to the goal.
Hide in the thickets so you can kill the samurai. Use the fishing rod you got from the previous area to kill the samurai on the bridge, and then take the smoke bomb on the bridge when you’re sure you won’t be spotted. Now go to the stone pavement hide in the thickets in order to kill a ninja. Now keep going down the path to kill another ninja. Go to the goal.
Jump into the thickets on your left, and then kill the guard. Now you’ll see two more guards beyond the door nearby. When it is safe, go into the room and hide in the nearby hiding spot. Now kill the guard when he gets near and then jump onto the rafters in order to kill the other guard. Now jump down and go into the nearby hallway and you’ll see a guard on the left. Kill him and grab the key. Take the ninja veil in the room and then hide in the shadows. Move forward and you’ll see the goal being guarded. Kill the guard and go through the goal.
You’ll see a guard immediately upon the area start. Extinguish flames nearby to stay in the shadows, then kill him when he faces away. Now go out and stay in the bushes and kill another guard. Go into the nearby door and take the cat. Go down the stairs and you’ll find two guards, one walking (that you can see), one standing (that you can’t). When both cannot see you, run out and kill the standing guard. In the prison you can find a poison. Extinguish the lights and kill the walking guard, then use the poison to destroy the lock, and grab the key and ninjato inside. Now go up the stairs and you’ll find a locked door nearby. Open it, and kill the walking gaurd inside. As you press on you’ll find another standing guard. Kill him when his back is turned. Now grab the key and unlock the goal door.
Go into the thickets. Kill the guard and take the box, then place it beside the nearby wall so you can jump onto it. Now kill the guard from aboce and find a key nearby. You’ll see a door near you and a guard inside. When he can’t see you, go into the shadows and jump onto the rafters. Kill the guard from above, then move along the rafters and you’ll find another guard that you can kill from above. Now jump down and move on and you’ll find a door with a guard outside. Kill him when his back is turned. You’ll find some ghostmakers nearby so use them to kill the last guard you can see. Now go to the goal.
STAGE 9 - ESCORTING THE PRINCESS
You’ll begin the stage with a swordfight.
Use a kunai to kill a guard on your right. Now jump onto a nearby tree and jump to another tree with a fishing rod at its base. Grab it then go back onto the tree. Now go to the next tree, and jump down. Now hand from the ledge on your left and kill the guard. Go back up and hide behind the nearby wagon. Kill the nearby guard and then jump down from the cliff onto a platform. Jump onto another tree and move to the next one. Jump to the next tree and then jump down. Kill a guard to your left by hanging to the left and go back to the beginning. Use a kasugai and you’ll see an enemy below. Kill him from above and then run to the goal.
Run through the bridge and jump onto the trees in order to jump over a hole on the ground. Now jump over the next gap, and ten the one to your left. Climb up and keep going, then hang on the ledge to wait for an enemy below you can drop down to kill. Keep going along the path and then you’ll find two guards when you’re at the door. When the armored guard is unaware, run to the guard and kill him from behind. Now use a ghostmaker on the armored guard. User another ghostmaker on the armored guard near the goal, and head through.
Kill the ninjas hiding in the thickets on either side with kunai. Now go onto the bridge, and then use another kunai to kill the gunner on the tower, and a ninja in the thickets. Hide in the thickets yourself and kill the guard. Run to the goal.
Kill the gunner on the tower with a kunai. Keep to the shadows and kill the nearby guard. Keep to the shadows and you’ll find a guard who stands there. Move up to him and kill both him and the guard in the room nearby in one stroke. Now you can use a knuai on the epxlosives in the room nearby to take out another guard, leaving you a clear way to the goal.
Go into the nearby door and grab the key, then kill the guard nearby. Use a ghostmaker on the other guard nearby and go to the other house where you’ll see another guard. Kill him and go up the stairs, where you will find another guard in the room. Kill him when his back is turned and then go outside. Kill the gunner, and then head to the goal.
Go around the corner of the building, and kill the nearby guard, then hide in the shadows after extinguishing a flame. Kill the nearby standing guard, and hide in the shadows again. Kill the gunner on the tower when the guard is beneath it to kill them both. Grab the key nearby and go into the building. Kill the guard inside, then use a kunai to kill an enemy in the thickets near the goal. Go to the goal.
Now you have another swordfight before the level ends.
STAGE 10 - SEKIYA NAOTADA
Hide in the thickets on the right when you’re not noticed. Then kill the ninja when he’s nearby. Now go to the thickets near the gaurd and kill him to take his key. Use a shuriken or kunai to kill the ninja hiding on the opposite side of where you are. Go to the goal.
Hide to the thickets and kill the guard when he is near. Go to the right and keep going, killing a ninja in the shadows with a shuriken. You’ll eventually come across a walking guard. Go under the balcony and kill him when he’s nearby. Now kill the other guard from the balcony and go to the goal.
Use a shuriken or kunai on a ninja in front of you, then on the two near the pond. Hide in the shadows after extinguishing the flames then kill the ninja as he nears. Now kill a ninja in the thickets near a hole in the wall. Go into the building and you’ll find a ninja you can kill when his back is turned. Now go out and you’ll find a walking guard you can kill from below the balcony nearby. Now you can make a beeline for the goal.
Shuriken/kunai the ninja hiding in the thickets, then hide in the thickets. Use another shuriken/kunai on a ninja when he gets near the fire to kill him. Now go up the stairs and you’ll find two guards. When they are nearby, throw a smoke bomb and kill them both. Now jump over the fire and go to the roof. You’ll see a platform with kasugai on them. Drop to it and kill the ninja nearby. Now you’ll find another ninja as you go forward, so kill him when his back is turned. You can now go to the goal.
Climb onto the rafters, and follow them leftwise. Kill a guard from above then drop down and go through the smoke. Use a shuriken when you find a ninja, and then go forward. You’ll find another ninja you can kill rather effortlessly, and go to the goal.
Grab the nearby shuriken, and kill the hidden ninja in the corner. Now grab the kasugai. Go to the door and use the kasugai on the mattress when the guard is away. When he comes back, kill him. Now you will see another ninja as you go to the door. Kill him when his back is turned and keep going. Jump over the fire, and go to the goal.
Grab the shuriken nearby and jump onto the rafters. Kill the ninja below you, and drop down. You’ll see a samurai and a fishing rod. Grab the fishing rod when the coast is clear and use it on the guard when he is near the fire to kill him. Now use a ghostmaker to blow open the wall and go through, then climb into the rafters. Kill the ninja, and head to the end of the level, and the game.
You’ll have to fight another swordfight. As always, you die in one hit, but swordfights are rather easy, so you shouldn’t have too much trouble.
Congratulations, you beat Tenchu: Shadow Assassins!